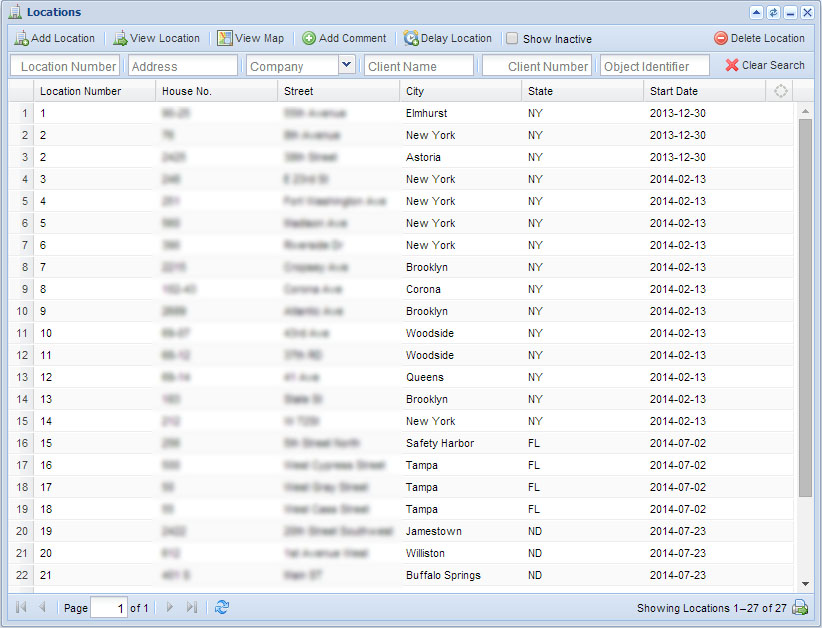
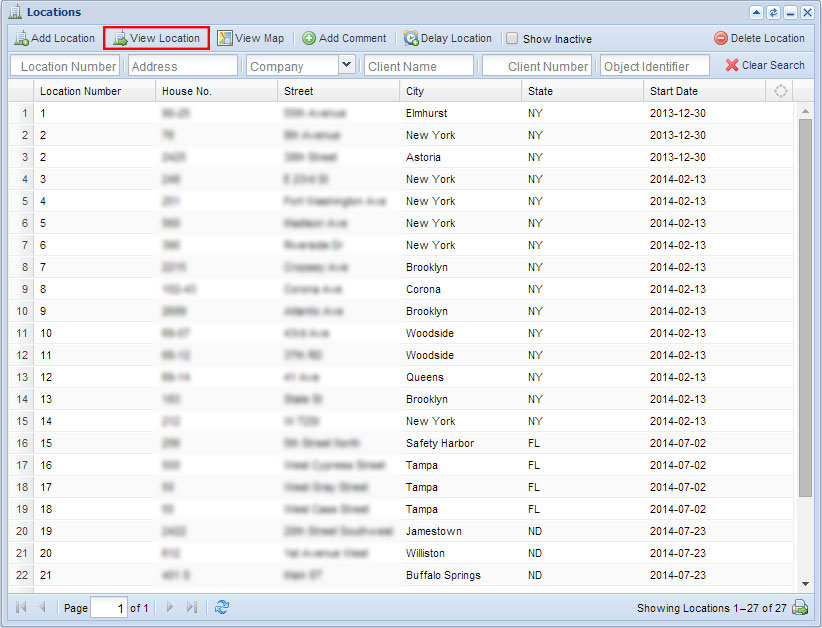
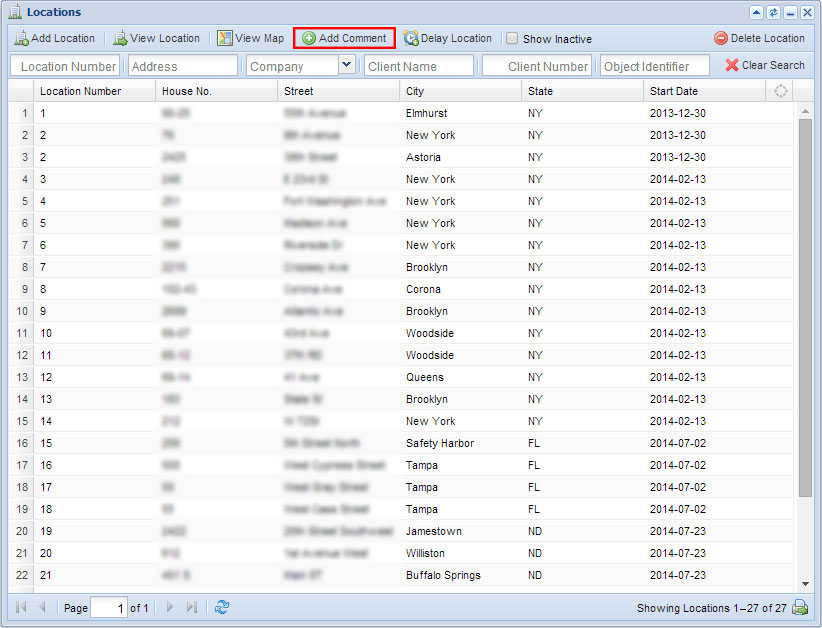
Located at the top of the Versentia Home Button menu, the Locations window gives you access to all properties visited and serviced by your company. From here you can access general information, add new locations or view their position on a map. In this section you can find:
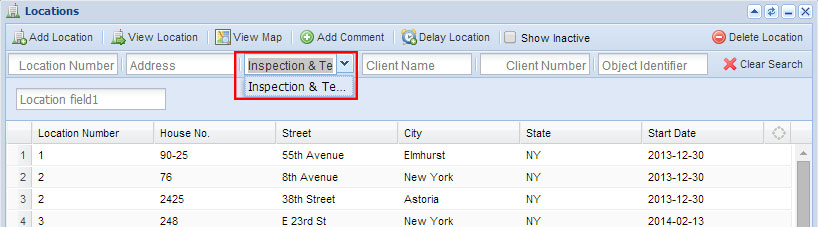
This section can be searched or filtered by the following options:
- Location Number
- Address
- Company
- Client Name
- Client Number
- Object Identifier
To clear the search field click the  Clear Search icon in the top right corner.
To Add a custom Search Filter
- Select Company from the Company drop-down list.
- Custom field search/filter will appear under the search filter pane.
To Remove Search Filter
- Check of the filter(s) you wish to remove.
- Click on the Clear icon.
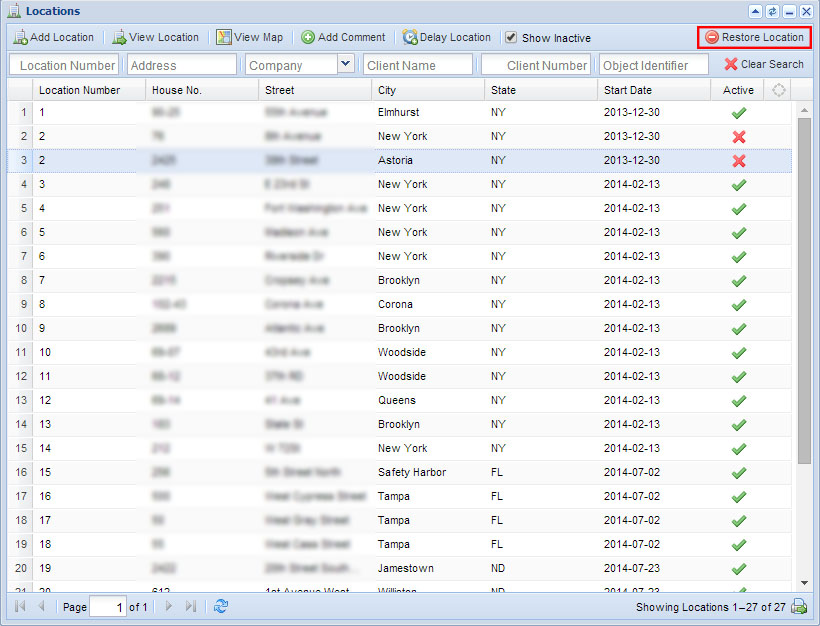
Show Inactive Locations
- To see inactive locations check Show Inactive located in the main Locations menu to the right.
Print Feature
- To print the current selected location click on the Print icon located on the bottom of the locations window.
Refresh Feature
- To refresh the current location list click on the
 Refresh icon located at the bottom of the locations window.
Viewing Multiple Pages
- Use the page navigation bar located in the bottom left corner of the Locations window. You can navigate through the pages by Skip to First/ Previous Page/ or Next/ Skip to Last Pages
This action can only be performed on a Deactivated Location.
- Select Show Inactive from the tab, this will show inactive locations with a red x at the end of their information string.
- Select a Deactivated Location , and then click on Restore Location in the top right corner.
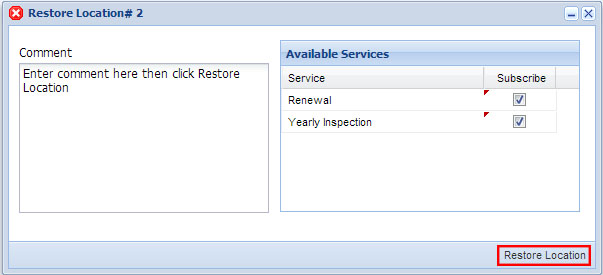
- Restore Location help window will open, select by checking off and subscribe to available service if applicable.
- Enter a comment and click on Restore Location.
- Alternate: Select and inactive location, click on the second tab, View Location, then click Activate Location in the help window.
Delete Location
To delete a location from the list, the icon is located in the top right corner of the window.
- Select a location to delete.
- Click on the
 Delete Location icon.
- Press Yes to confirm.
- All deleted locations will be considered inactive.
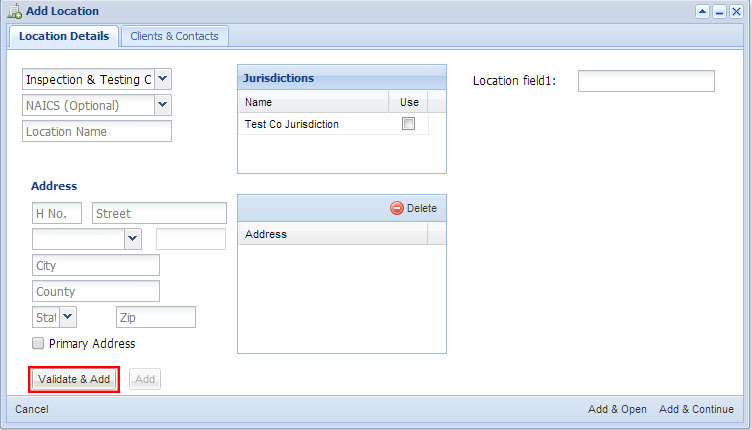
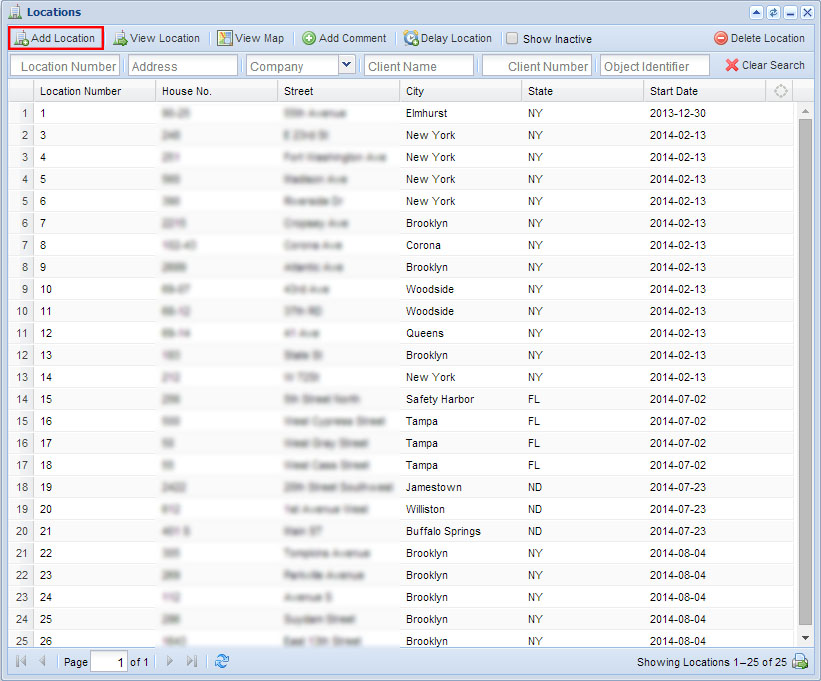
From the main Location Window, select the first button, this will bring up a help window.
- Add Location window will open and in Location Details tab, select a company from the drop down list.
- Select a jurisdication and fill out any other necessary information.
- Enter the following required information:
- H Number
- Street
- City
- State
- You may chose to fill out the following optional fields:
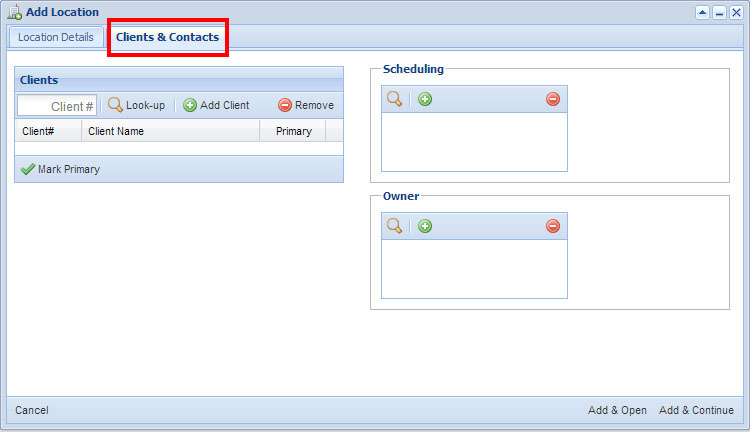
- Click Validate & Add below the address information, then select the second tab in the help window: Clients & Contacts To finish adding a location this tab must also be filled out.
*Versentia makes an attempt to validate the address and extract jurisdiction information however if a Validation Failed message is received, click Add (next to Validate & Add ) to proceed.*
- Each location requires a minimum of one Client and Contact.
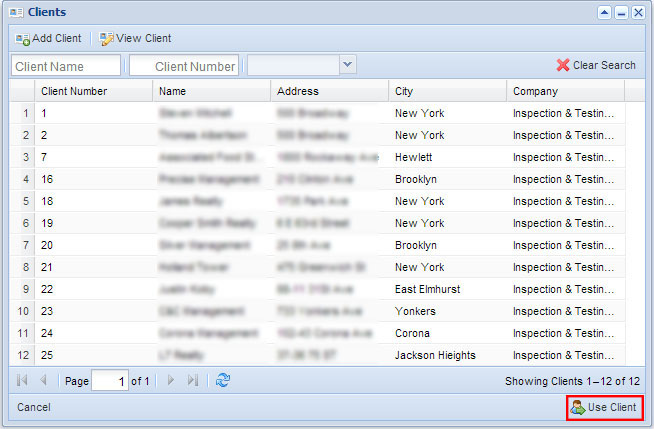
- To assign an existing client enter their client number and click on the Look-up icon in the help window. Select a client from the search list and click Use Client in the bottom right corner.
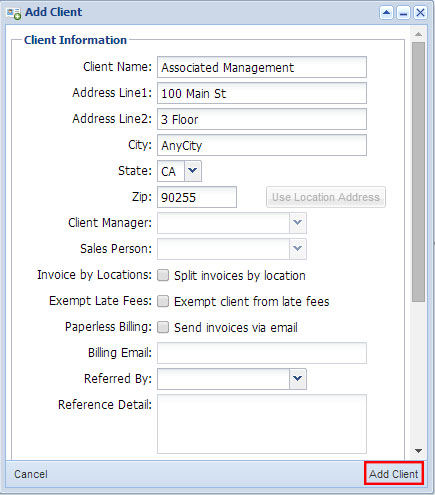
- To add a new client click on the Add icon, and fill out all the required client information:
- Client Name
- Address Line 1 (to use the location address click Use Location Address)
- City
- State
- Zip
- Referred By
- Reference Detail, based on Referred By
- Contacts (one needs to be entered when creating a new Client)
- You may choose to fill out the following optional fields:
- Client Manager
- Salesperson
- Invoice by Locations
- Exempt Late Fees
- Paperless Billing (if selected, enter email address in Billing email field.)
- Scroll down to Contact section of the Add Client help window to add a Contact.
- Click Add Client .
- Once you have filled out both the Location Details and Client & Contacts tab click on either:
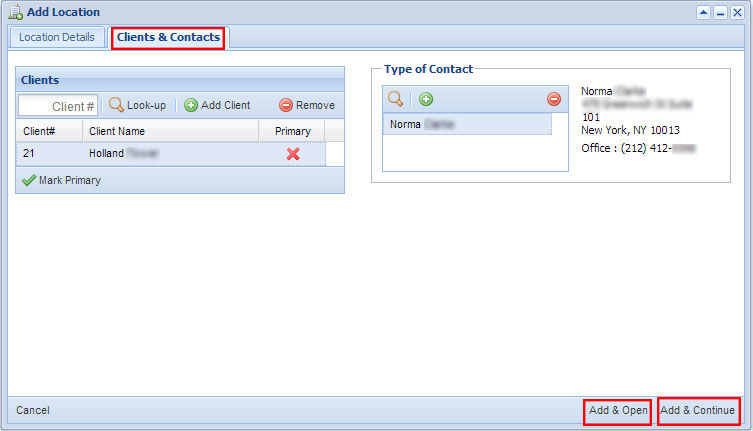
Add & Open which will create the new location, it will remain in view OR click on Add & Contunie, create the new location and opening a blank Add Location window so you can contunie adding new locations.
If you are adding, creating, or filing out a questionnaire and a question is missed Versentia will not allow you to proceed. Review the input information and make sure that you have properly filled out all the required fields.
Removing Information in Add Location Help Window
If you need to remove information from the Clients & Contact tab you will need more than one client in the screen. Select the Clients & Contacts tab in the help window.
- If there is more than one client in the Client list then you can delete a client from the list. Select the Client you wish to delete and press the Delete icon.
- You cannot delete the primary contact (the one with the green check-mark next to it). If you wish to delete the contact marked as primary you must first choose another contact, mark them as primary, then repeat the step above to delete the contact.
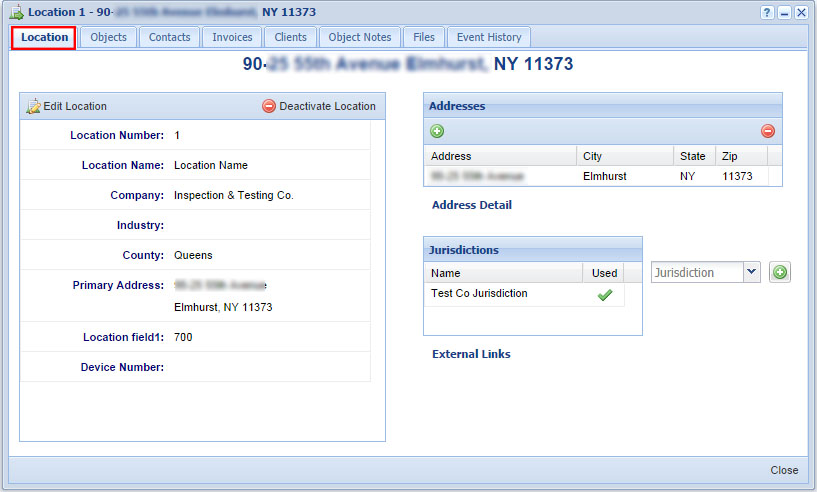
This is the second button in the main Locations window. You will automatically be in the first tab, called Location.
The first tab in the View Locations window.
Edit Location
- Click Edit Location located in the left corner of the window.
- Edit desired location information.
- Scroll down and click submit.
Deactivate Location
- Click Deactivate Location located to the right of Edit Location.
- Click Yes to confirm action.
Please note all active objects will need to be deactivated first. Successfully deactivated locations will have the address appear in red and an X in the Active column.
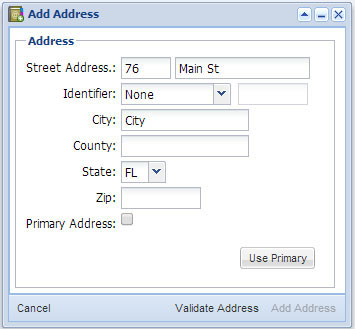
To Add an Address
- Click the Add icon located under the Address list.
- Enter the address in the Add Address help window.
- Check off Primary Address, if applicable.
- Click Validate Address then Add Address in the bottom right corner of the help window.
To Remove an Address
- Select an address, that is not the primary address, to remove.
- Click the Remove icon located under the Address list.
- Click Yes to confirm.
External Links
If avaliable selected jurisdications will have External Links:
- Click on the Jurisdiction that is listed under the Jurisdiction section from the Location tab/screen.
- External Link will lists additional links/websites regarding the Location.
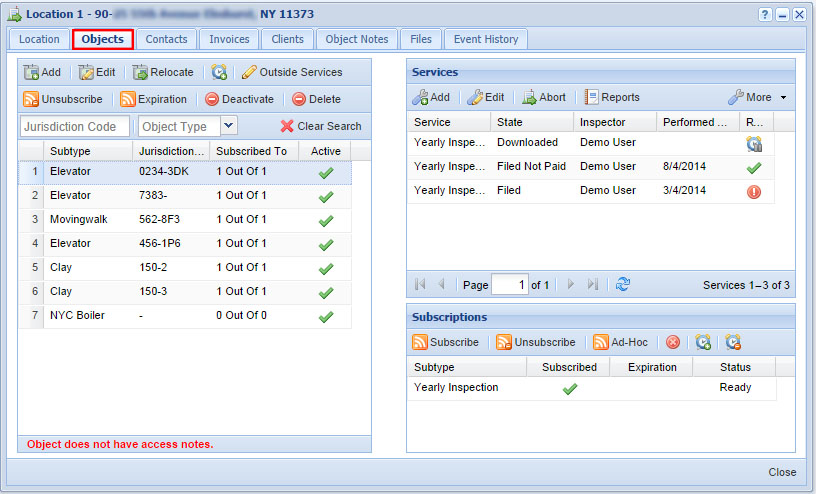
The second tab in the View Locations window. Object tab will list the objects that are assigned to the location. From here you can see and assign services and subscriptions to any object(s) listed under the property.
Search Options
Search by:
To clear the search field click the Clear Search icon in the top right corner.
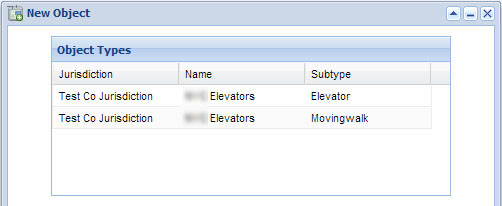
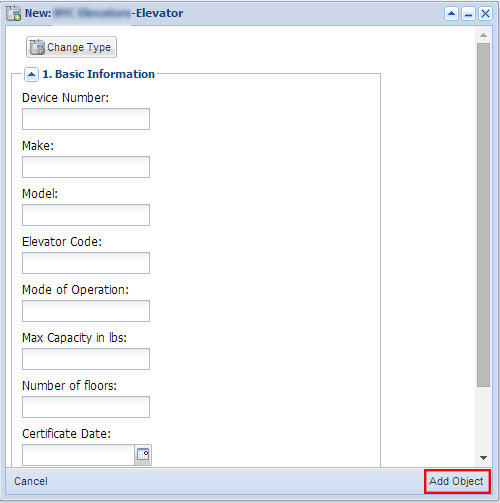
Object: Add
To add an object.
- Click on the
 Add icon.
- Select an object to add from the help window.
- Enter in any new object information in the following window:
- Click Add Object in the bottom right corner.
- Repeat to add another object.
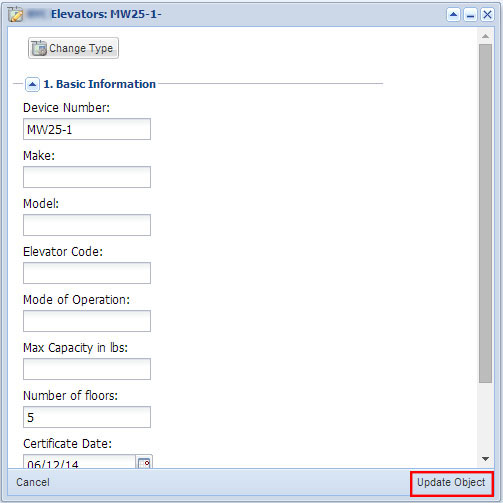
Object: Edit
To edit an object, select and object.
- Click on the
 Edit icon.
- Update any changes in the help window.
- Click Update Object in the bottom right corner.
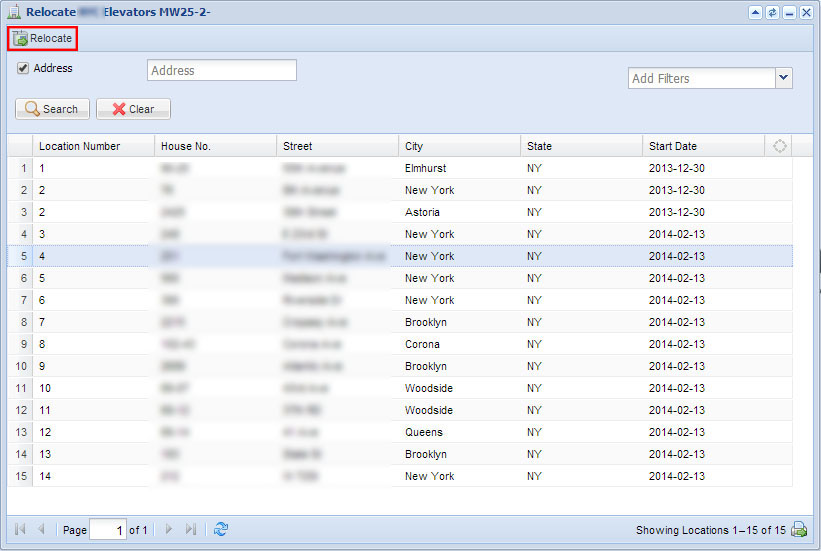
Object: Relocate
To relocate an object to another Location, select and object.
- Click on the Relocate icon.
- Select a new Location from the help window.
- Click Relocate in the top left corner.
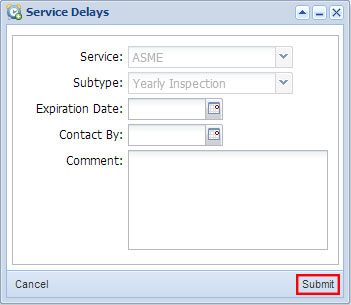
Object: Delay
To insert a service delay to an object, select an object.
- Click on the
 Delay icon.
- Select a service from the help window.
- Select a subtype, optional.
- Enter expiration date.
- Enter contact date, optional.
- Enter comment.
- Click Submit.
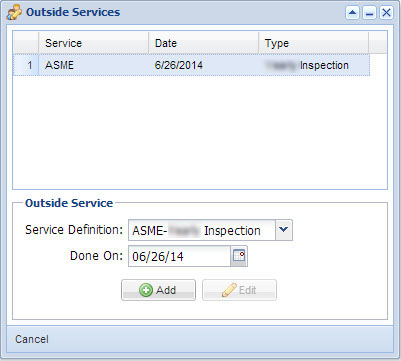
Object: Outside Services
Outside services are used to indicate that an object was serviced by another company, this will help keep the cycle service up to date. Versentia will consider the outside service and calculate how much time in the cycle needs to pass before another service needs to be performed. To add an outside service to an object, select an object.
- Click on the Outside Services icon.
- Select a Service Definition from the drop down list in the help window.
- Enter a Done On date.
- Click Add.
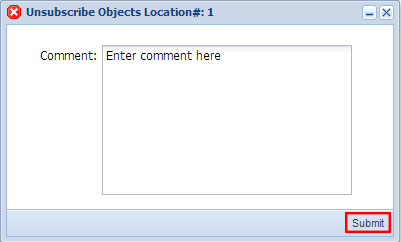
Object: Unsubscribe
To terminate services to an object, select an object, or multi-select objects with your shift key.
- Click on the Unsubscribe icon.
- Enter a comment, required.
- Click submit.
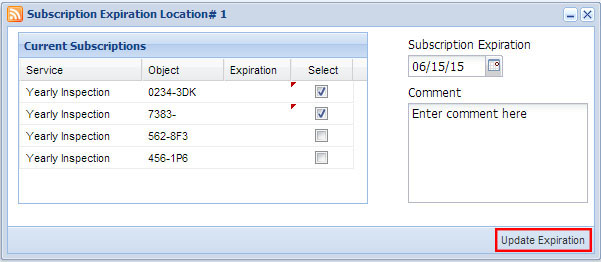
Object: Expiration
To enter an expiration date for a subscription.
- Click on the Expiration icon.
- Select which subscription to expire by checking off the service in the help window.
- Enter a subscription expiration date.
- Enter a comment, required.
- Click Update Expiration.
- Services/Objects that have an expiration date will be considered unsubscribed after the expiration date.
Object: Removing Expirations
To remove an Expiration Date on an Object:
- Click on the Expiration icon.
- Select which subscription to remove the expiration date from by checking it off (the subscription expiration date should be left blank).
- Enter a comment, required.
- Click Update Expiration.
Object: Deactivate
To deactivate an object select an object. (To see how to activate a location click Activate Location.)
- Click on the Deactivate icon.
- Enter a required comment in the help window.
- Click Submit.
Object: Delete
To delete an object select an object.
- Click on the Delete icon.
- Click Yes to confirm deletion.
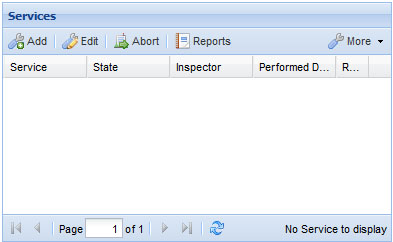
Services
This section is located to the top right of the Objects tab. It allows you to view previous and current services for a selected object; you can also add, edit and abort services. To learn about all the features offered click here.
Subscriptions
This section is located to the bottom right of the Objects tab. It allows you to view previous and current subscriptions for a selected object; you can also Unsubscribe and add ad-hoc services. To learn about all the features offered click here.
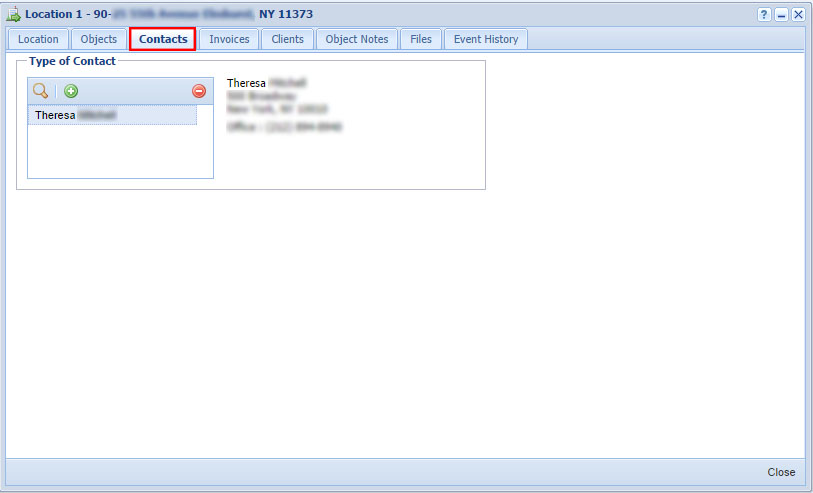
This is the third tab in the View Locations window. Here you can create new types of contacts, or add existing contacts so that they are informed about the location. To read more view click on Contact.
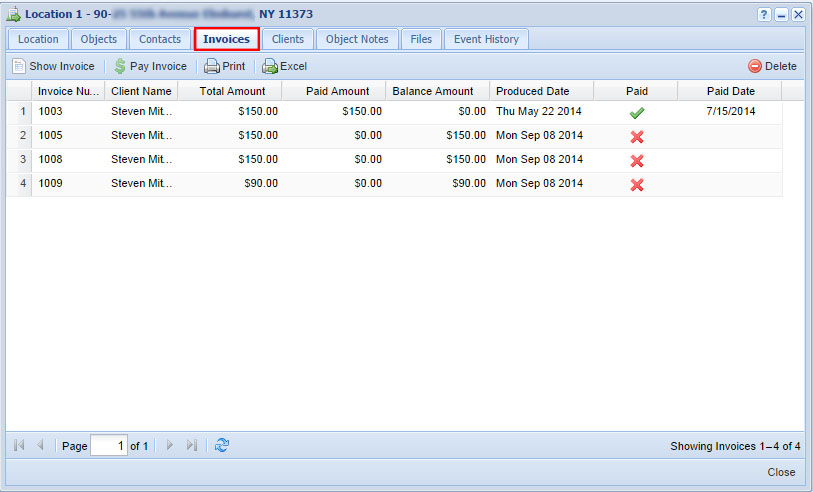
The fourth tab in the View Locations window. Invoices listed in this screen are services/jobs that have been performed for this location. When services move to another location, the invoices will go along with the corresponding location.
Show Invoice
Select an Invoice to view.
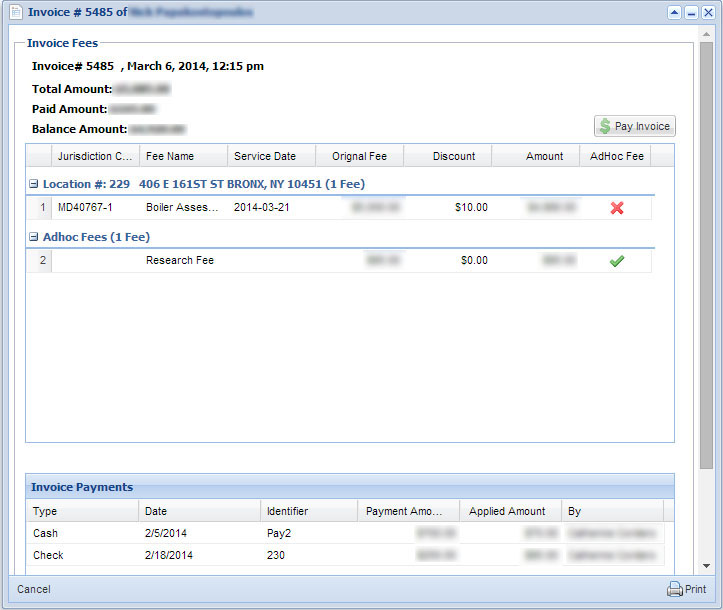
- Click Show Invoice in the upper left corner. You will be taken to the following help window:
- Click Pay Invoice in the top right corner of the Show Invoice help window. You can also select an invoice from the main Invoice list and click Pay Invoice, next to Show Invoice. This will apply payment to that invoice:
- Select date, defaults to current date.
- Select form of payment, defaults to check.
- Enter identifier
- Select Recipient.
- Enter payment amount.
- Click Submit.
Select which payment to apply the invoice to by checking it off in the list, under Use.
- Enter the amount to apply to the Invoice or check Pay Full to pay off the entire Invoice amount.
- Click Submit, located bottom of screen.
Edit Payment
In the Pay Invoice help window click Edit Payment.
- Make any desired edits to the payment.
- Click Submit to update.
Print
To print an invoice go back to the Invoice tab.
- Select an invoice from the list.
- Click the Print icon.
- To print multiple invoices use the shift key to multi-select and then follow steps 1-2.
Excel
To generate an Invoice Report select an invoice from the list in the main Invoice tab.
- Select an invoice from the list.
- Click the Excel icon.
- An Excel document will automatically be downloaded to your computer.
Delete
To delete an Invoice select an invoice from the list in the main Invoice tab.
- Select an invoice from the list.
- Click the Delete icon in the top right corner.
- Enter a comment, required.
- Click Submit.
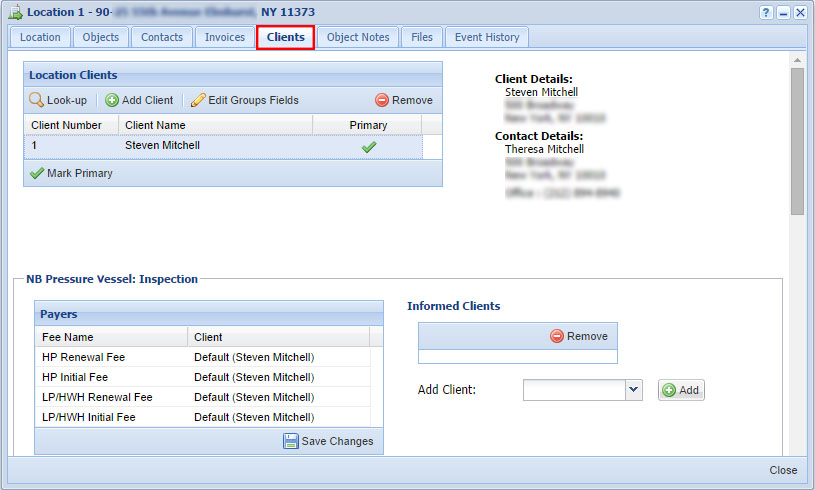
This is the fifth tab in the View Location window. Here you can add clients, view their details, manage what clients receive updates about services and edit their information.
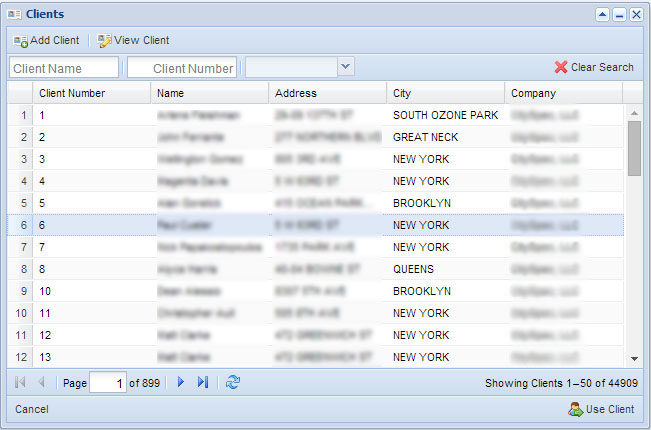
Look-Up
To look-up a client, follow the following steps; for more information visit the Clients page under User Manual Sections.
- To look up location clients click on the Look-up icon.
- Select a client.
- Click Use Client.
Add Client
To add a new Client, follow the following steps:
- Click on the Add icon, fill out any required information.
- Client Name
- Address Line 1
- City
- State
- Zip
- Referred By
- Reference Detail, based on Referred By.
- Contacts
- Optional fields:
- Client Manager
- Salesperson
- Invoice by Locations
- Exempt Late Fees
- Paperless billing, if selected, enter email address in Billing email field.
- Click Add Contact in the bottom right corner to complete.
Edit Group Fields
- To remove one of the listed clients click on the Remove icon.
- To mark a client as Primary, select the desired listed client and click Mark Primary.
Update Payers
The list below
Location Clients, entitled Payers, can be updated. If you want to reassign the payment to a contact that is not the Primary Contact (default payer) you can do so here.
- Go to the drop down list for the service you wish to change the payer for.
- From that list select the desired payer, if they are not there you must add them in the contacts list above.
- You can also add Informed Payers, located to the right of any services. These payers are not responsible for the payment but receive copies and updates of any results or inspections. Click Add to add them to the payers.
- Change any other services, scroll down and click Save, or the new payer will not be saved.
Informed Clients
For Clients that wish to be informed and sent result letters and or reports regarding the service for the location:
- Choose from the Add Client drop down list next to the service.
- Click Add.
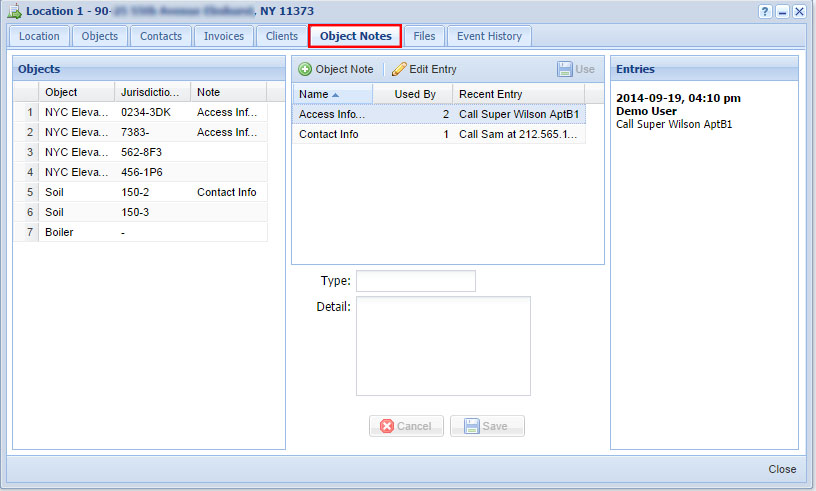
This is the sixth tab under the View Locations window. Here you can add notes to objects.
Add Object Note
- Click on the Object Note icon.
- Enter type, which will show up as the name of the note.
- Enter details, this is the content of the note.
- Click Save and the note will appear in the list above.
Edit Entry
- Select a note and click on the Edit Entry icon.
- Edit any desired information.
- Click Save and the note will appear in the list above.
Use
To assign a note to an object.
- Select an object from the left most list.
- Select a note from the middle list.
- Click the Use icon and the note will be assigned.
The seventh tab under the View Locations help window. Here you can upload and download assigned to a location. The file tab will have upload, download, delete and search capabilities. Files already attached to this location will be listed to the left with the file name and creation date. Select a file and a preview screen will appear to the right if preview is supported for that file type. Currently supported file types for preview are; pdf, jpg, jpeg, and png.
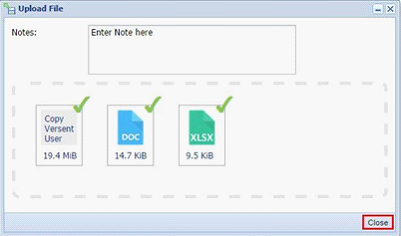
Upload File
- Click Upload.
- Click Drop files here to upload.
- Select a file or multi-select file to upload (acceptable files pdf, .doc, .jpg, .png, .docx, .tiff, .tif, .xls, .xlsx, .csv).
- Click Open (successfully uploaded document will appear with green check mark).
- Click Close to complete (Date created and file name will appear in Files tab).
Do not see the notes column? Notes and User are hidden columns. (To enable, select a column and click on arrow down icon click on column and check off Notes and/or User to view the column.)
Download File
- Select a file and click Download.
- Selected file will be downloaded onto your computer and will be listed in Downloads folder. (C:\Users\username\Downloads)
Delete File
- Select a file or multiselect and click Delete.
- Enter a comment and click Submit to complete.
Search File
The search field feature helps you easily find the document you're look for. It searches through document titles, notes, creating users, and even the document content of searchable documents. Just enter what you're looking for in the search field, hit enter and we'll return just what you're looking for.
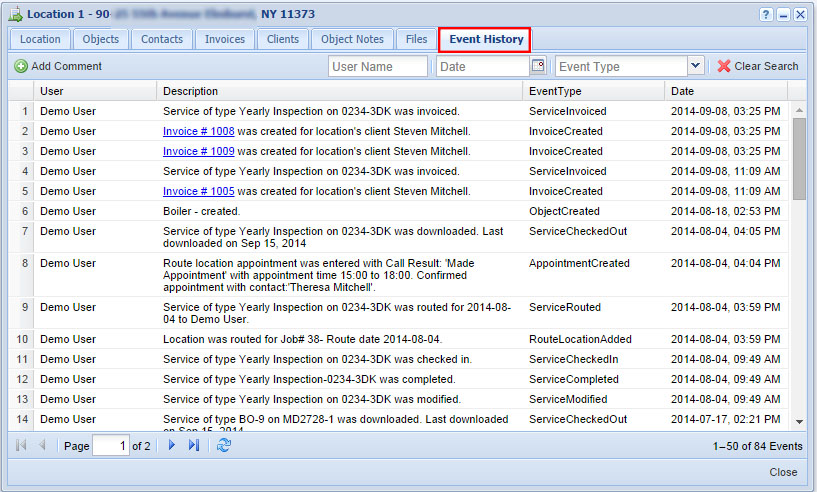
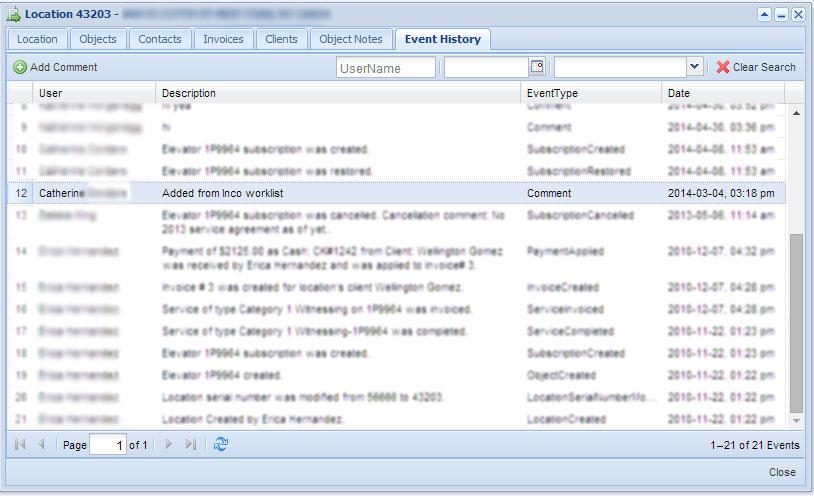
This is the eighth tab under the View Locations window. Here you can see a description of events recorded at the location.
Search Features
In this tab you can search comments associated with this location. They can be searched by:
- User Name
- Date
- Event Type
To clear the search field click the Clear Search icon in the top right corner.
Add Comment
See Comment for more information on how to perform this action.
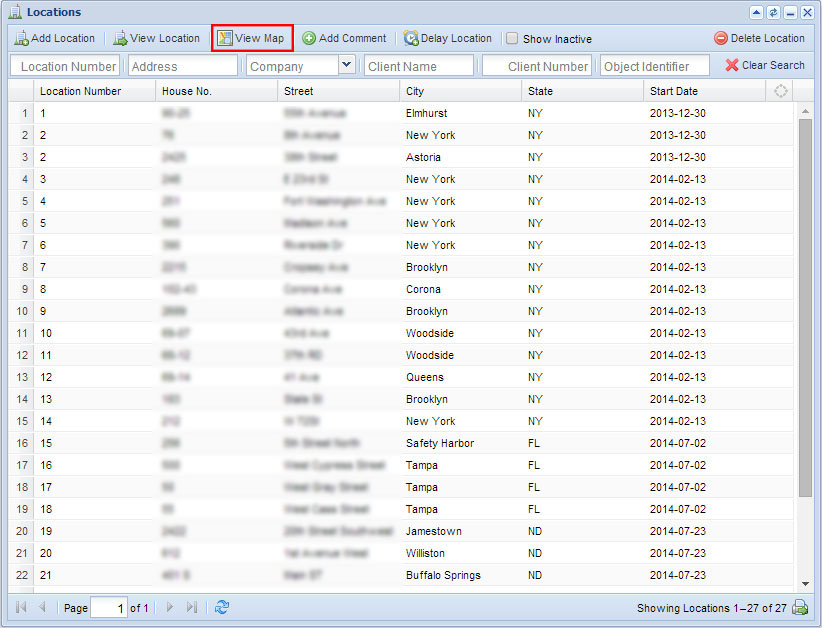
This is the third button on the main Locations page, this will allow you to pull up a map with a marker of any given location.
- Select a location from the list.
- Click on View Map, a help window with a map will appear, a red location maker will mark the exact address.
- You can navigate the map with the Zoom In icon and the Zoom Out icon.
- For a street view click the location maker on the map and it will take you to a street view.
Add Comment
This is the fourth button on the main Locations page, this will allow you to add a comment to any location.
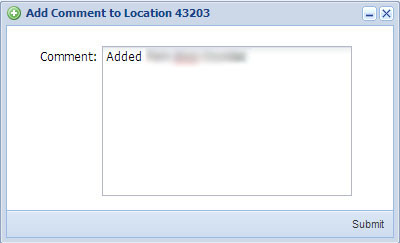
- Select a location from the list.
- Click on Add Comment, a help window will appear, enter comment.
- Click Submit.
- The comment will appear in the View Location > Event History tab of the selected location:
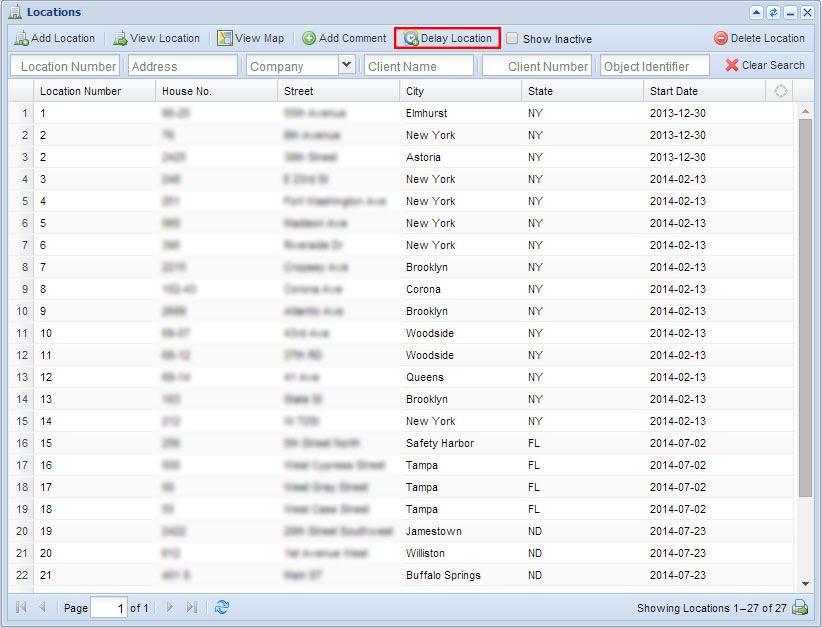
This is the fifth button on the main Locations page, this will allow you to delay a service from being performed in any location.
- Select a location from the list and click on Delay Location.
- Select a Service to delay from the drop down menu in the help window:
- Select a subtype, if applicable.
- Enter an Expiration Date.
- Enter a Contact By date, optional.
- Enter comment (required).
- Click Submit to delay service to chosen location.
Comment
To add a comment:
- Click on Add Comment icon, a help window will appear, enter desired comment.
- Click Submit.
- Comments entered will appear in View Location>Event History tab of the selected location.
This feature can be accessed from Locations > View Location > Objects tab. Here you can see services assigned to an object, their history and add or edit services.
Add
Located at the list to the top right, entitled Services.
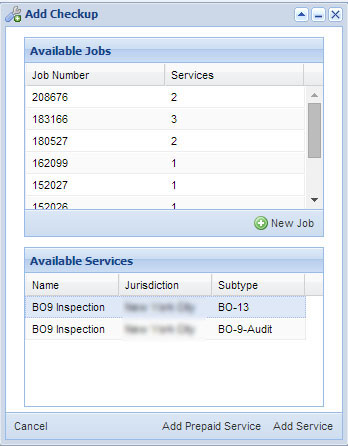
- Select an object from the left, then click the Add icon under Services. A help window will open.
- Select an Available Job to add, or use the New Job icon to the bottom right of the list to add a new job.
- Select which services are available to add in Available Services.
- Newly selected service will generate and appear in the New Inspection tab.
- Perform the added service by filling out all the required information in the New Inspection.
- Click Add Service or Add Prepaid Service in the bottom right corner of the help window.
For prepaid services click Add Prepaid Service, this action will generate a Preview Invoice.
Edit
To edit a service, select a service and press Edit in the Service list. From here you can edit the service, view uploaded photos and more.
- Update or edit any of the required fields in the help window.
- Click Update Service in the bottom right corner to complete.
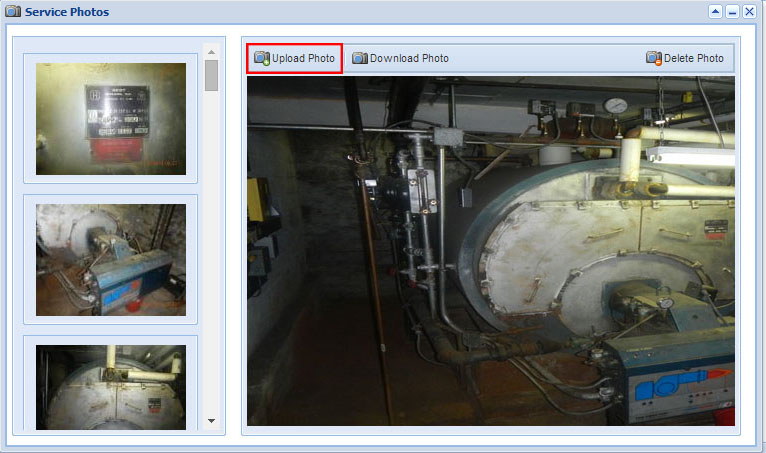
To upload service photos:
- Select a service and click Edit, then click Service Photos in the bottom left corner of the window.
- In the help window you will see the following:
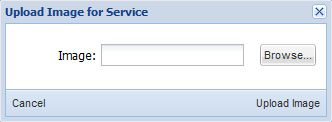
- You can upload photos taken of the service to Versentia by clicking on the highlighted button above. Browse through photos on your computer to upload to Versentia:
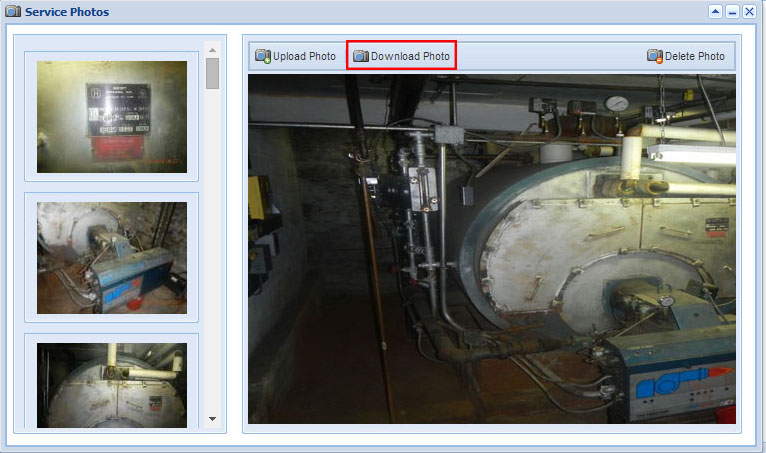
You can download a service picture to your computer by clicking on the Download Photo button:
You can also delete photos by clicking on the Delete Photo icon located at the top right of the window.
Abort
To abort an open service select a service from the list.
- Click on the Abort icon, you will get a help window.
- Select an abort category from the drop down list.
- Select an abort state from the drop down list, depending on the abort category an abort state may be required.
- Enter a comment, required.
- Click Submit.
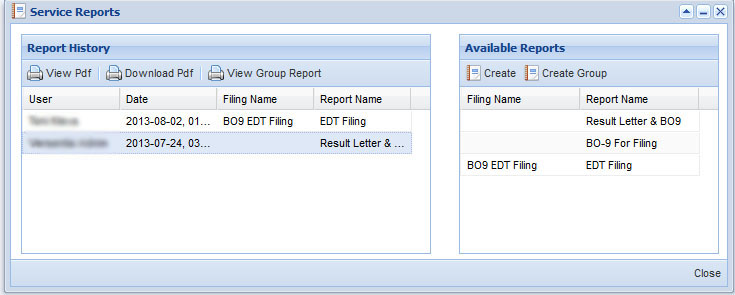
Report
To generate or view a report select a service from the list.
- Click Report, you will get a help window.
- Select a service from Available Reports.
- Click Create or Create Group (to create multiple reports for all objects).
- The report(s) will appear under Report History.
- Click on View PDF or Download PDF to view or save a copy of the report.
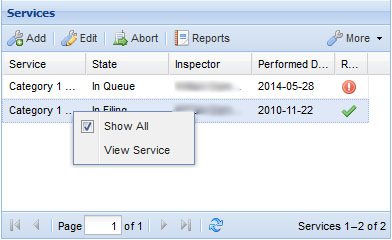
Show All
The above image shows the list that appears with more options. This will show all services associated with the object, to include aborted ones. To show all services, select a service from the list.
- Right click on the service, a menu will appear.
- Select Show All.
- Unselect it to return to normal.
View Service
This will show you current and previous inspections,(if available) in a read-only format. To view a service, select one from the list.
- Select an object for which you want to see a service (left side under Subtype) then select a service in the service section (right side under Services).
- Right click on the service, a menu will appear, shown in above figure.
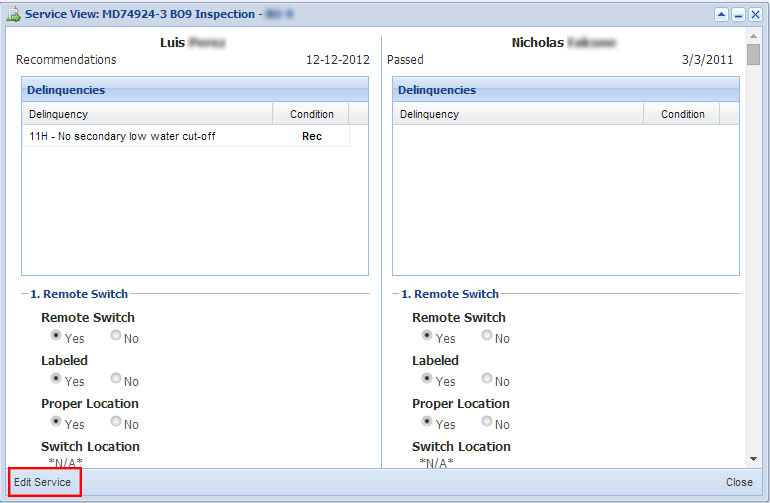
- Click View Service. The service view window will open:
- To edit the current service (left), click Edit Service.
Additional Features
To view additional features:
- Click on the
 More icon, you will see: Block Filing, Move Service, Add Follow-Up.
Block Filing
To block a filing, select a service.
- Click on Block Filing under More.
- Add a comment, required.
- Click Submit.
Blocked filings feature cannot be performed for services that are marked as Filed in state column.
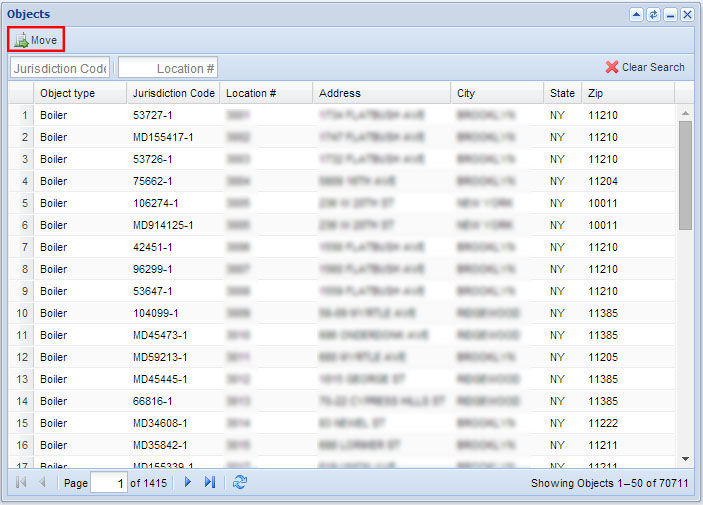
Move Service
To move a service to another object, select a service.
- Click on Move Service under More.
- Select an object from the list in the help window to which to move the service.
- Click Move in the top left corner.
Add Follow-Up
To add a follow-up or a check-up on a service, select a service.
- Click on Add Follow-Up under More.
- Add a New Job from the bottom right, or select an existing job in the help window.
- Select from Available Services list.
- Click Add Prepaid Service (this action will generate a preview invoice) or Add Service from the bottom right corner.
Subscriptions section can be located in Clients>View Client>Service List tab and in Location>View Location>Object tab.
From here you can subscribe and unsubscribe objects from a service(s), or add a one time (Ad-Hoc) service for an object.
There are two types of subscriptions available:
Cycle Subscriptions: Subscriptions can be annual, every 3, or every 5 years based on the service; and it will not end unless they are un-subscribed or expired. Cycle subscriptions can be in different status such as declined, delayed or expired.
Ad-Hoc Subscriptions: These are subscriptions that do expire; they are entered as a onetime service and will not re-occur.
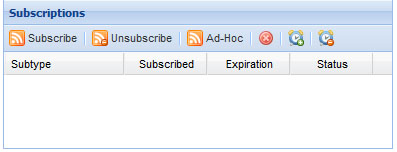
Subscribe
This is the first option under Subscriptions:
- Select an object, which will bring up a list of possible subscriptions available to the object.
- Select one of the services.
- Select Subscribe, a green check-mark will appear next to it when it becomes active, signifying that the service has been subscribed to the object.
Unsubscribe
This is the second option under Subscriptions:
- Select a subscription under Subtype.
- Click Unsubscribe.
- Enter a comment, required.
- Click Submit.
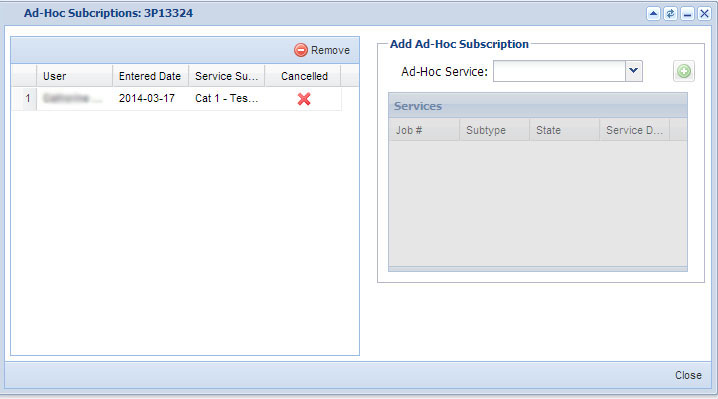
Ad-Hoc
This option allows you to add a one time service to an object. It will expire after it is performed and will not repeat for the next cycle.
- Click Ad-Hoc.
- To add an Ad-Hoc Subscription select from Ad-Hoc Service drop-down list (services maybe required for certain ad-hoc subscriptions).
- Click on the Add icon to add it. The added service will be listed on the left side.
- To remove an Ad-Hoc service, select the service and click on the Remove icon.
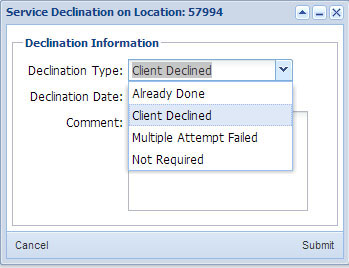
Service Decline
This option allows you to decline a service from the current cycle.
- Click on the
 Decline icon.
- Select Declination Type from the pop-up drop down menu.
- Enter the Declination Date.
- Enter comment, required.
- Click Submit.
Delay
Located below the service list and directly to the right of the Decline Service icon, this allows you to delay a service from the current cycle. Select a service.
- Click on the
 Delay icon, this action will only be valid if the service selected is subscribed to.
- Select Subtype, optional.
- Enter the Expiration Date.
- Enter Contact Date, optional.
- Enter comment, required.
- Click Submit.
Exempt Delay
To exempt a delay, select and object, then subscription. This action is only valid if a delay is in place on a cycle.
- Click on the
 Exempt Delay icon, directly to the right of the Delay icon.
- Select a delay to exempt.
- Click Exempt Delay.