
Clients
Located in the Versentia Home Button menu, the Clients window gives you access to all clients who have used your company's services. From here you can access general information, add new information or clients and assign delays to a requested service. In this section you will find:
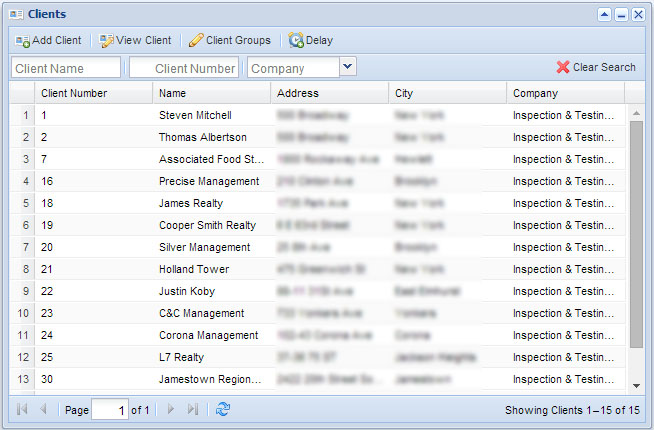
Filter or search in locations by:
- Client Name
- Client Number
To clear the search field click the ![]() Clear Search icon in the top right corner.
Clear Search icon in the top right corner.
Viewing Multiple Pages
- Use the page navigation bar located in the bottom left corner of the Clients window. You can navigate through the pages by Skip to First/ Previous Page/ or Next/ Skip to Last Pages
Refresh Feature
- To refresh the current location list click on the
 Refresh icon located on the bottom of the Clients window.
This is the first button under the client window, it allows you to add a new client to the existing list.
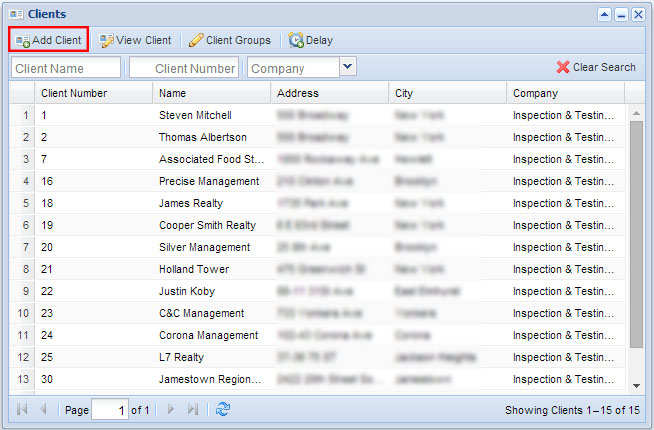
- Click on Add Client.
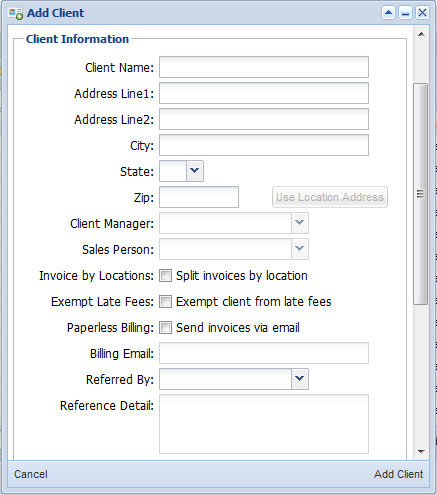
- Enter required information in the help window:
- Client Name
- Address Line 1
- City
- State
- Zip
- Referred By
- Reference Detail, based on Referred By
- Contacts (one needs to be entered when creating a new Client)
- You may choose to fill out the following optional fields:
- Client Manager
- Salesperson
- Invoice by Locations
- Exempt Late Fees
- Paperless Billing (if selected, enter email address in Billing email field.)
- You must also add a contact, which you can do at the bottom of the help window, either by selecting one from the
 Search list or entering a new one.
 - Once you have input all the information click Add Client in the bottom right corner.
This is the second button in the main Client window. This allows you to view all current information about an existing client, it also allows you to edit or update any information. Select a client and click on the button to pull up the information help window.

Client Summary is the first tab in the View Client help window. This tab gives you all the basic information on the selected client.

Edit Client
- To edit the client click on the
 Edit Client icon in the upper left corner.
 - Edit any desired information in the help window, then click Update Client in the bottom right corner.
Client Summary Report
Located to right of the screen under the Summary list, the Client Summary Report lists all completed, pending services and open service fees for the current cycle. It will automatically put these into an excel format.
- To generate the report click the Client Summary Report icon.
- Your report will automatically be uploaded, you will receive a request to open it in excel, click Yes to view.
Contacts
Located to bottom right of the screen, Contacts allows you to search and add new or existing clients.
To Remove a Contact
- To remove a contact from the page, select a client, and click on the
 Remove icon.
 - Press Yes to confirm; this action cannot be performed on the primary contact.
To Mark Contact as Primary
- Select a contact to mark as Primary, there can only be one primary contact per location.
- Click Mark Primary in the bottom left corner.
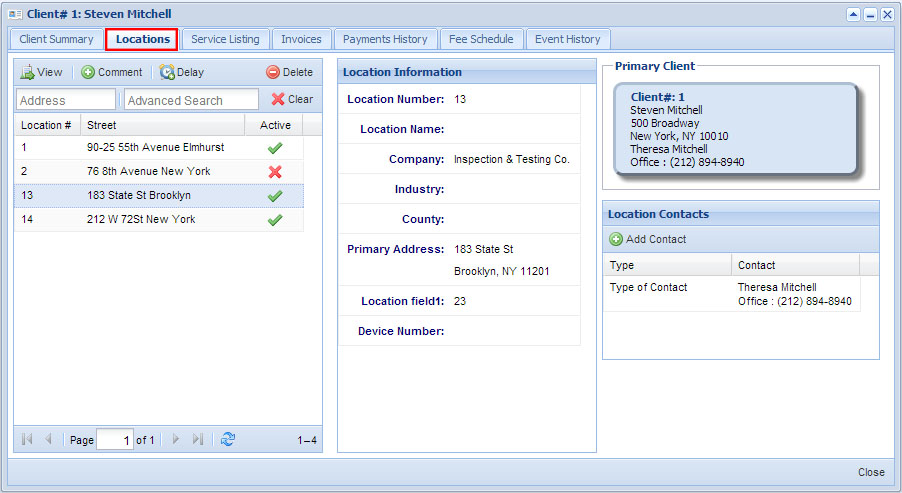
Locations is the second tab in the View Client help window. This tab gives you all the information on any locations associated with the selected client. When a location is selected it will display corresponding Service Lists and Reports.
Search Features
You can search features by:
- Address: enter partial or full address to quickly search for a location.
- Advanced Search: enter any part of the location information (location number, custom field information, etc) to search for the location.
Click on the ![]() Clear icon to remove all search features.
Clear icon to remove all search features.
Tip: To view service listings of a specific location, select a location listed on the left side of the Clients/Locations tab, and click on Service Listing .
Locations: View
- To view location information select an address and click View.
- This will take you to the same window as Versentia Home>Locations>View Locations would, see View Locations under the Locations section for more information.
Locations: Comment
To add a comment to a location, see comment.
Locations: Delay
To insert a service delay to a location, select an location from the list.
- Click on the Delay icon.
- Select a service from the help window.
- Select a subtype, optional.
- Enter expiration date.
- Enter contact date (optional).
- Enter comment (required).
- Click Submit.
Locations: Delete
To delete a location, select a location:
- Click on the Delete icon.
- Click Yes to confirm deletion.
- The location will appear as inactive from this point on.
Locations: Restore
To restore an inactive location, select an inactive (will not work on active) location.
- Click on the Restore icon.
- Add a comment in the help window (required) and click Submit.
Location Information
Located in the middle, this list pulls up an overview of any selected location.
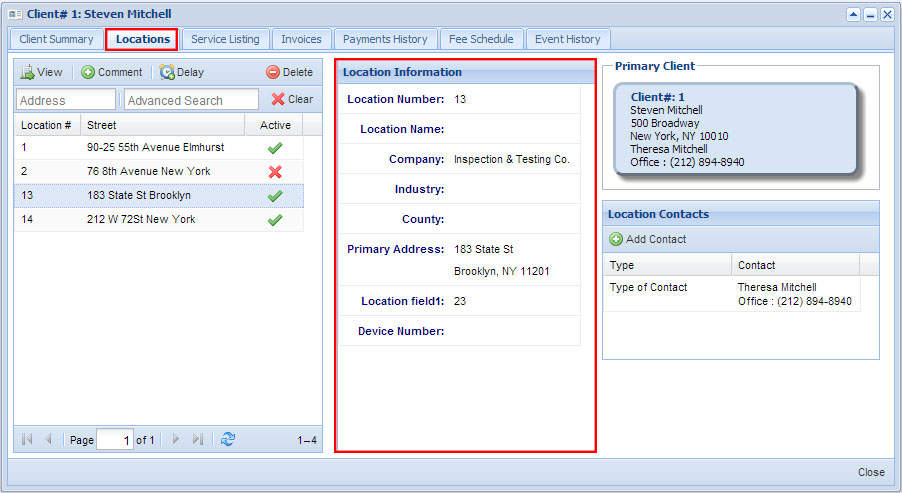
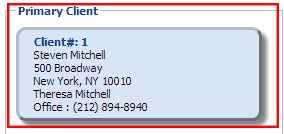
Primary Client
Located in the right, it displays the primary client basic information. Double click on the Client section to view Client information in more detail.
Location Contacts
Listed in this section are the location contacts of the selected Location. To add a contact for the selected location:
- Click Add Contact
- Fill out the necessary fields
- Click on the Add Contact button. (For more info on Contact)
Service Listing is the third tab in the View Client help window. This tab gives you all the information on any services performed at locations associated with the selected client.
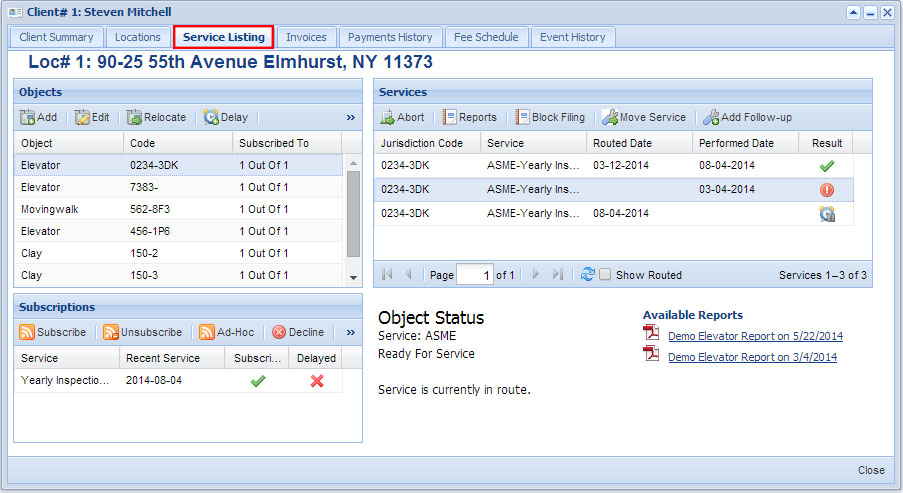
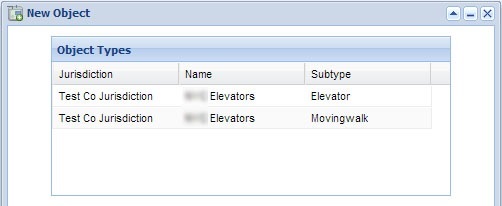
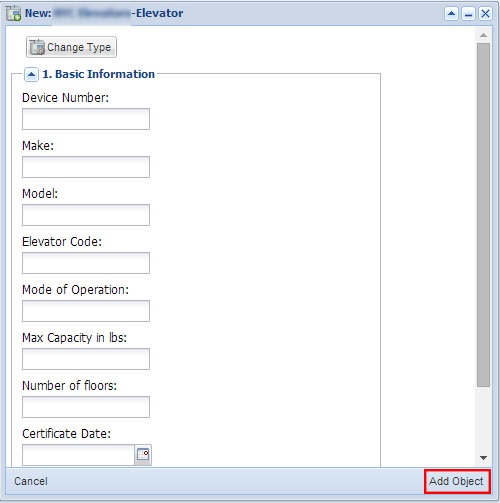
Object: Add
Located in the right most list, the feature allows you to add objects to a location.
- Click on the
 Add icon.
 - Select an object type from the help window.
- Enter in any new object information.
- Click Add Object in the bottom right corner.
- Repeat to add another object or to change type of object, click Change Type in the upper left corner.
Object: Edit
To edit an object select an object from the right most list.
- Click on the Edit icon.
- Edit the object information in the help window.
- Update any changes in the help window.
- Click Update Object in the bottom right corner.
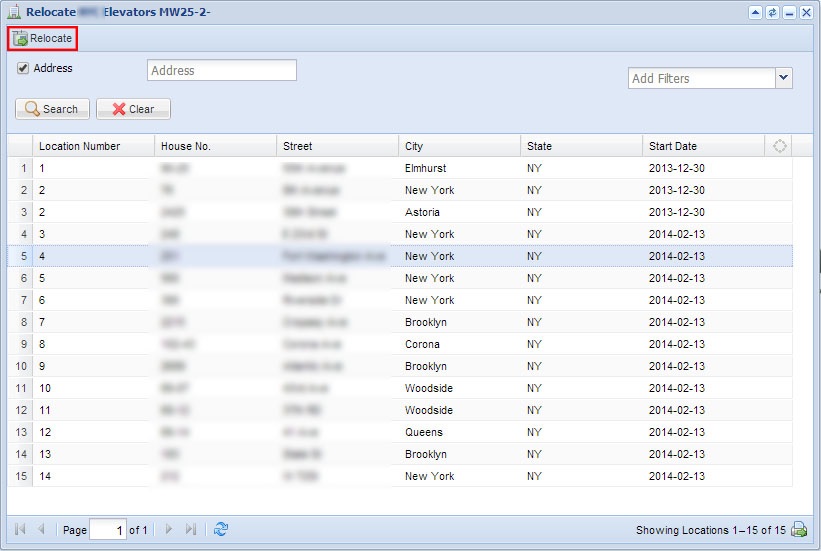
Object: Relocate
To relocate an object to another location, select an object from the right most list.
- Click on the Relocate icon.
- Select a location to relocate the object to from the help window.
- Click Relocate in the top left corner.
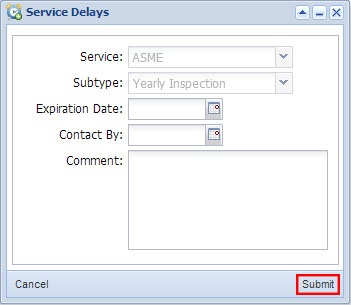
Object: Delay
To insert a service delay to an object, select an object from the right most list.
- Click on the
 Delay icon.
 - Select Service.
- Select Subtype (optional selection).
- Enter Expiration Date.
- Enter Contact Date (optional selection).
- Enter Comment (Required).
- Click Submit.
Object: Additional Features
To see Additional Features click on the >> icon to see a small menu. The features include: Outside Services, Unsubscribe All, Deactivate Object and Delete Object.
Outside Services
- Select an object to which to add outside services.
- Select a service definition.
- Select a subtype, optional.
- Enter Done On date.
- Enter contact date, optional.
- Click Add.
To edit an Outside Service:
- Select a service by double clicking.
- Edit Service Definition and/or Done on date.
- Click Edit to update.
To remove an Outside Service:
- Select a service and right click.
- Select Remove.
Unsubscribe All
- Select a location from which to unsubscribe all objects.
- Click Unsubscribe All under the >> icon.
- Enter a comment, required.
- Click Submit.
Deactivate Object
- Select an object to deactivate.
- Click Deactivate under the >> icon.
- Enter a comment, required.
- Click Submit.
Delete Object
- Select an object to delete.
- Click Delete Object under the >> icon.
- Click Yes to confirm action.
Search Features
You can search features by:
- Location
- Address
- Invoice
- Jurisdiction Code
- Route
Click on the ![]() Clear icon to remove all search features.
Clear icon to remove all search features.
Abort
- Select a service and click on Abort.
- Select a Category from the help window.
- Select Abort State, this may be required depending on the category selected.
- Enter a comment, required.
- Click Submit.
Reports
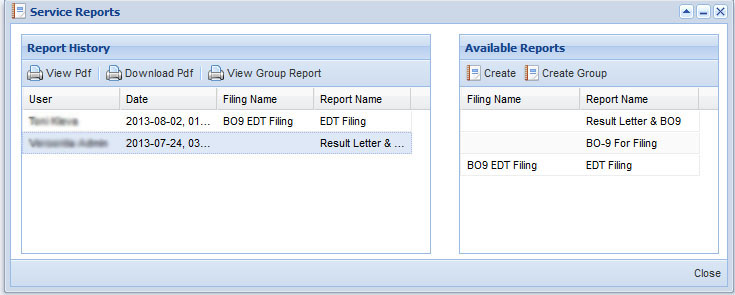
- Select a listing to generate a service report.
- Click Reports, if report is available, a help window will appear.
- Select a report from the right side list of the help window to create a service report.
- Click on Create or Create Group to create a report for one object all objects at that location.
- Click Prepaid Service, which will generate a prepaid invoice, or Add Service, which will appear in Locations> Object in the Service section.
- The report(s) generated will appear in the list to the left under Report History.
- Click on View PDF or Download PDF to view or download the generated report(s).
Block Filing
Located under the main Service Reports window, this feature allows you to block filing for a selected service.
- Select a service.
- Click Block Filing.
- Add a comment, required.
- Click Submit.
Move Service
Located in the main Service Listings window. To move a service to another object selected one of the listed services.
- Click Move Service.
- Select an object to move the service to.
- Click Move in the top left corner of the help window.
Add Follow-Up
Located under the main Service Reports window, this feature allows you to add a follow-up on a selected service.
- Select a service.
- Click Add Follow-Up.
- Add a a new job or select an available job from the help window.
- Select a service from Available Services.
- Click Prepaid Service or Add Service.
Object Status
The current status of the an object will appear in lower right section of the Client>Service Listing window.
- Select a service to view the current object status.
Available Reports
Located in Client>Service Listing window in lower right section next to Object status.
- To view a report (if available), select a service and a list of reports will be available in this section.
- Click on PDF icon and report will open on another tab in a PDF format available to be saved and or printed.
Invoices is the fourth tab in the View Client help window. This tab gives you all the information on any invoices at locations associated with the selected client.
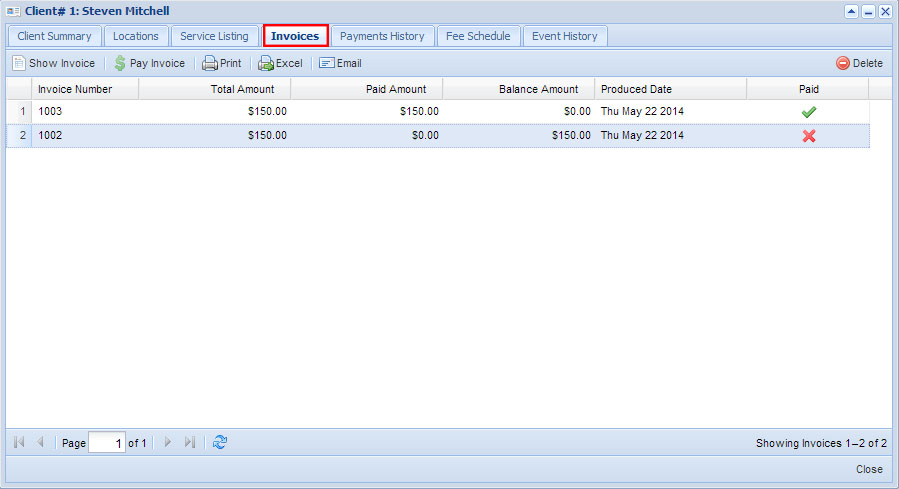
Show Invoice
Located in the upper left corner of the window.
- Select an invoice to view.
- Click Show Invoice, a help window will appear where you can view all the specific invoice data.
Pay Invoice
This feature allows you to apply monies to an invoice.
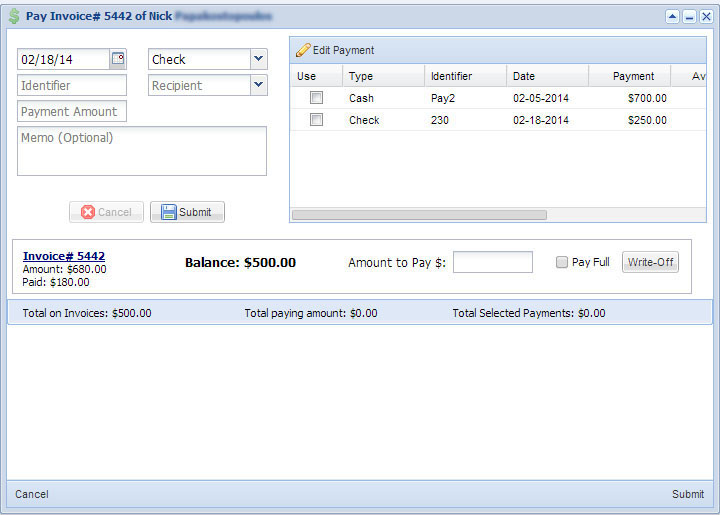
- Select an invoice to pay.
- Click Pay Invoice, a help window will appear where you can apply a payment.
- Select Date, the default is the current date.
- Select a form of payment, the default is set to check.
- Enter Identifier.
- Select a recipient.
- Enter payment amount.
- Click Submit.
- You will see the payment help window in the list in the right side of the window.
- Select which payment to apply by checking off the box under Use.
- Enter the amount you want to apply to the invoice or check Pay Full to pay off the entirety of the invoice amount.
- Click Submit, located at the bottom of the window.
Edit Payment
This feature allows you to edit previous payments, it is in the Pay Invoice help window.
- Select an invoice to edit and click Pay Invoice.
- In the help window, above the payments there is an option to Edit Payment.
- Select a payment to edit and change desired fields.
- Click Submit to apply changes.
- Select an invoice.
- Alternate: use the Shift key to multi select invoices to be printed.
- Click Print in the main invoice window.
Excel
To generate an excel spread sheet of the invoice.
- Select an invoice.
- Click on the Excel icon.
- An spreadsheet of the selected invoice will automatically be downloaded to your computer.
To email invoices, this action only valid for clients with paperless billing enabled.
- Select an invoice.
- Alternate: use the Shift key to multi select invoices to be emailed.
- Click on the Email icon.
- An email with the selected invoice will automatically be sent to the client.
Delete
To delete an invoice.
- Select an invoice.
- Click on the Delete icon in the upper right corner.
- Click Submit.
Payment History is the fifth tab in the View Client help window. This tab gives you the payment history of any invoices at locations associated with the selected client.
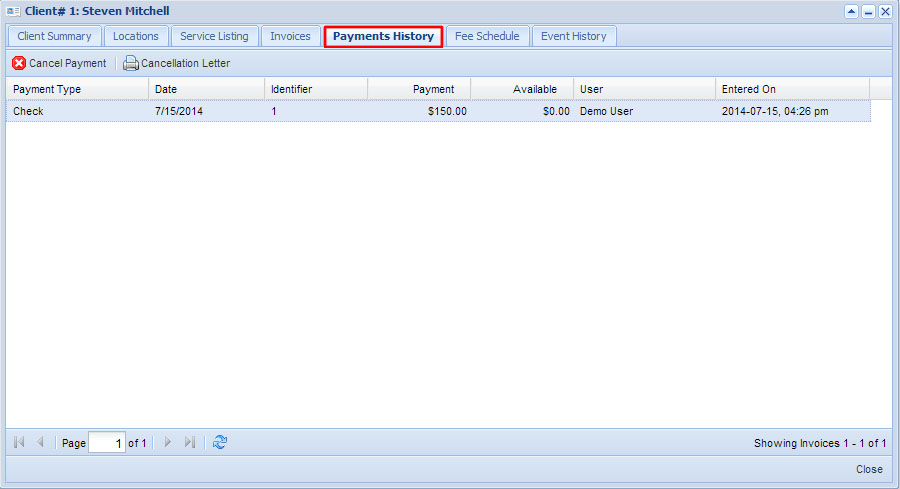
Cancel Payment
To cancel a payment from a client.
- Select the payment you want to cancel.
- Click Cancel Payment.
- Enter a comment, required.
- Click Submit.
Cancellation Letter
This action will allow you to send a pre-scripted letter to a client whose payment was canceled. This action will not work on payments that are not canceled.
- Selected the payment which has been canceled.
- Click Cancellation Letter.
- The letter will be downloaded to your computer in PDF form so you can send it to the client.
Fee schedule is the sixth tab in the View Client help window. This tab allows you to apply and schedule any fees a client may owe. The fee structure for clients is customizable.
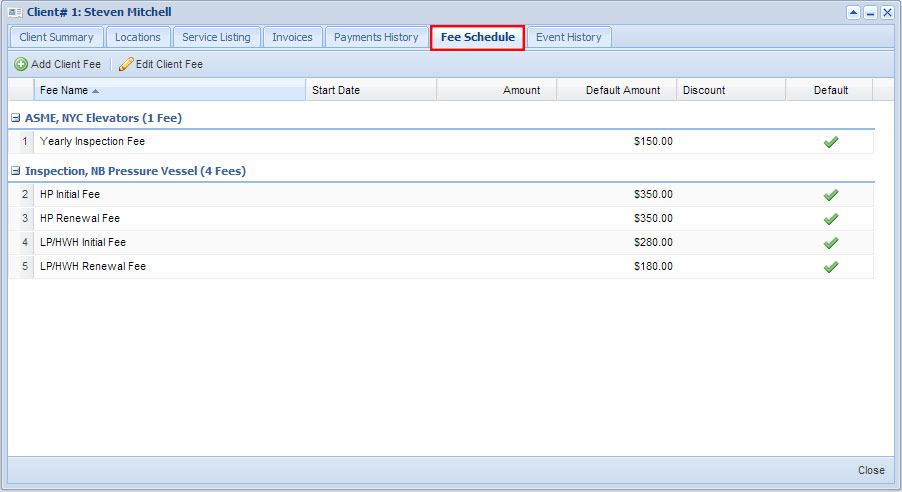
Add Client Fee
To add a fee to a client, select a fee to add.
- Click the Add Client Fee icon.
- Enter a Start Date (required) the fee will take effect on this date after entry.
- Enter the fee Amount.
- Click Insert.
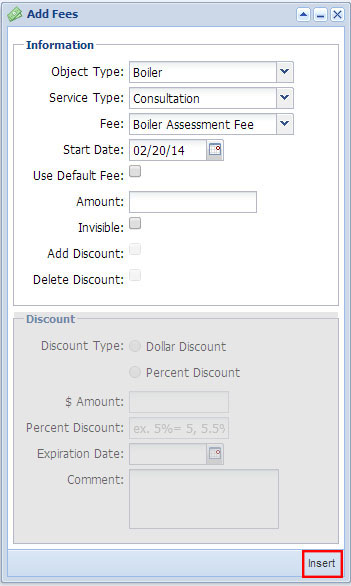
To add a discount:
- In the same window, if you wish to add a Discount check off Add Discount.
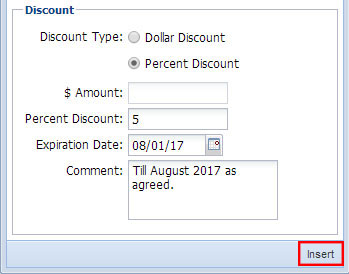
- This will open the Discount field, then select a discount type (dollar or percentage).
- If a dollar discount is selected enter the amount in the $ field.
- If a percent discount is selected, enter the percentage amount in percent discount.
- Enter an expiration date, if applicable.
- Enter comment, optional.
- Click Insert.
Edit Client Fee
To edit an existing fee select a fee to edit.
- Click the Edit Client Fee icon.
- Edit desired data.
- Click Update to complete, located in the bottom right corner.
The seventh tab under the View Clients help window. Here you can see a description of events applied to the Client.
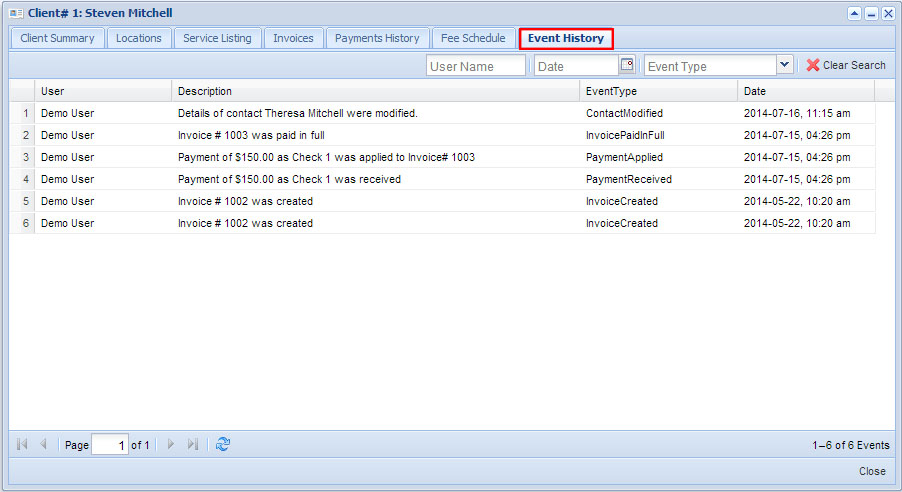
Search Features
You can search features by:
- User Name
- Date
- Event Type
Click on the ![]() Clear icon to remove all search features.
Clear icon to remove all search features.
Located under the main client window, Client Groups allow you to see what clients are linked to a specific group. Client Groups is a feature in which clients can be assigned or removed from a group.
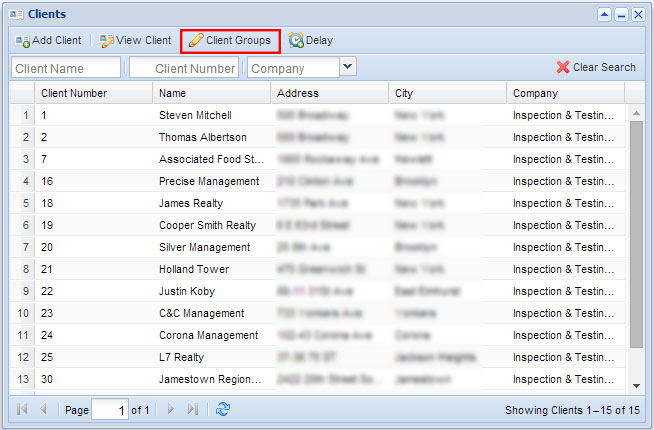
Add Client
- To add a client to a Client Group select a client from the list.
- Click on Client Groups, you will get the following help window:
- Select a group from the drop down list to which to add the selected client.
- Click Add to Group in the bottom right corner.
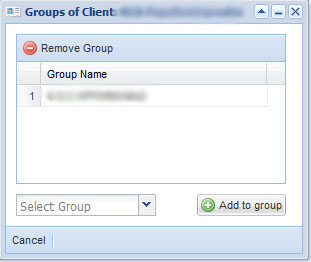
Remove Client
- To remove a client from a group select a client and click on Client Groups.
- You will get a help window with a list of all the groups the client belongs to.
- To remove a group, select one and click on the Remove Group button at the top left of the page.
Located under the main client window, the Delay icon allows you to assign a delay on a service for a particular client.
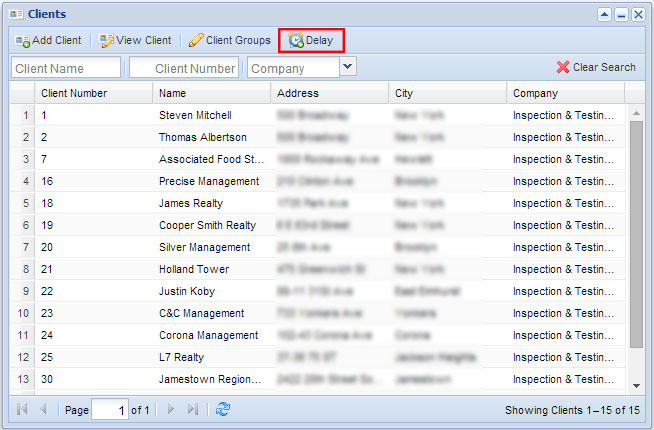
- Select a client.
- Click on Delay.
- Select what type of service you want to delay from the drop down menu.
- Select a subtype, if applicable.
- Enter Expiration Date.
- Enter Contact By date (optional).
- Enter comment (required).
- Click Submit.
Contact

Search Features:
You can search Contacts by:
- Email Address
- Contact Name
To clear the search field click the ![]() Clear Search icon in the top right corner.
Clear Search icon in the top right corner.
To Add A Contact
- Click on Add icon.
- Fill out the required information in the help window:
- First Name
- Last Name
- Address Line 1 (to use location address click Use Client Address)
- City
- State
- Zip
- Click to enter phone number at the bottom of the page
- You can choose to fill out the following information:
- Company Name
- Salutation
- Address Line 2
- Email address
- Zip
- Click Validate then Add Contact.

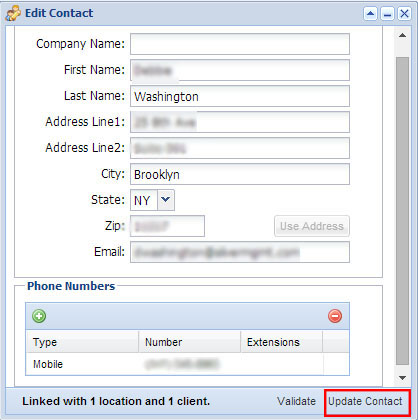
Edit Contact
To edit an already existing contact, click Edit Contact
- Make the necessary edits in Edit Contact help window
- Click Update Contact to complete.
Delete Contact
To permanently remove a contact from Contact window.
- Select contact from the list.
- Click Delete Contact.
- Confirm deletion.
Use Contact
To search and use an existing contact.
- Select contact and click Use Contact in the bottom right corner.