
Located in the Versentia Home Button menu, the Logistics window gives you access to all the routes your inspectors are scheduled for. From here you can access current, past or future routes, edit them and create new ones. In this section you will find:
To get to this window, go from Versentia Home>Logstics>Routing. Routing is the first option on the menu, click on it and you will be directed to the 'Routes' window.

Search Options
You can search the page by:
- Inspector Name (choose one from the drop down menu)
- Route Start Date
- Route End Date
- Zip code
- To see or search only completed routes check off Completed Routes
To clear the search field click the ![]() Clear Search icon in the top right corner.
Clear Search icon in the top right corner.
Quick View
To view an inspectors route:
- Select inspector and date of which route you want to view.
- Click on the
 to the left of the inspectors name.
 - This will expand the window and show you the route on a map:

Mark Ready
When a route is marked ready it can be downloaded by an inspector to their mobile device.
- Select a route.
- Click on the Mark Ready button to the top right of the page.
- You should see a green check mark appear next to the route under the ready column. When it has been downloaded you will see a green check-mark in the Downloaded column as well.
Tip: When scheduling a route, if all appointments have been confirmed the route will automatically be ready for download. (green check mark will appear)
Print Route
This feature allows you to print a route.
- Select a route.
- Click on the Print Route button to the top right of the page.
- A PDF document with a list of the route locations will be downloaded to your computer.
Delete Route
This feature allows you to delete a route.
- Select a route.
- Click on the Delete Route button to the top right of the page.
- Click Yes to confirm.
This is the first button located under the Routes window. From here you can create a new route.
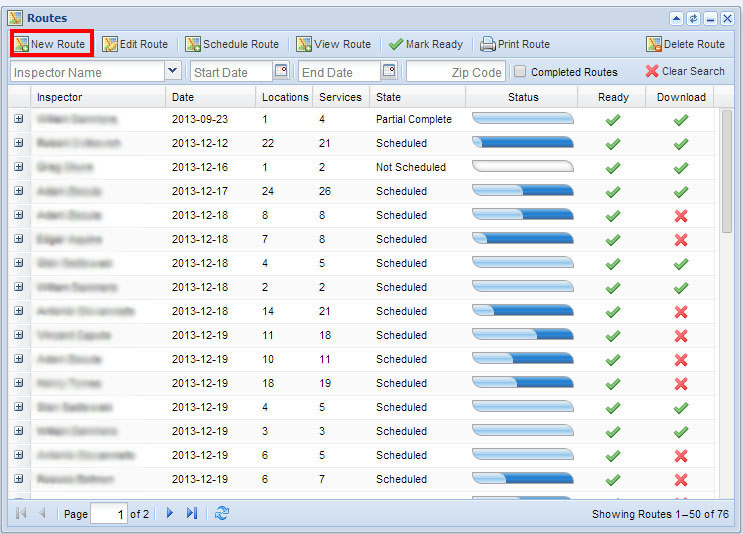
- Click New Route in the top left corner of the window.
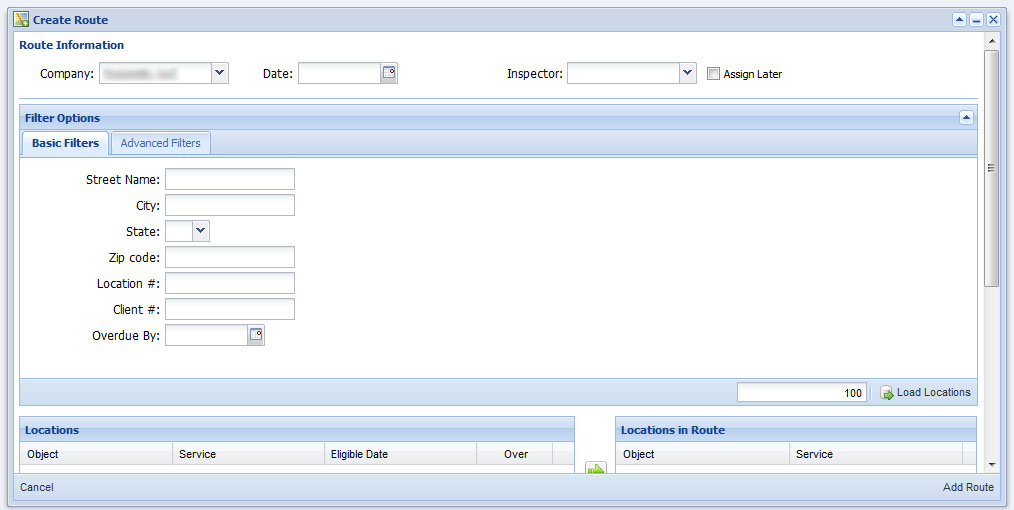
- Enter route information into the help window:
- Company (this may be a preset depending on your login)
- Date
- Inspector whom you are going to assign the route to
- Assign Later: You can check off Assign Later if you want to create an unassigned route. To assign an inspector at a later time you will need to Edit the route.
- Select filter options.
To Create a New Route Using Basic Filter Options
- Scroll down in the New Route window, you will see tabs with two filter options. In the Basic Filter tab enter one or more filters to search for eligible services:
- Street Name
- City
- Zip Code
- Location Number
- Overdue By
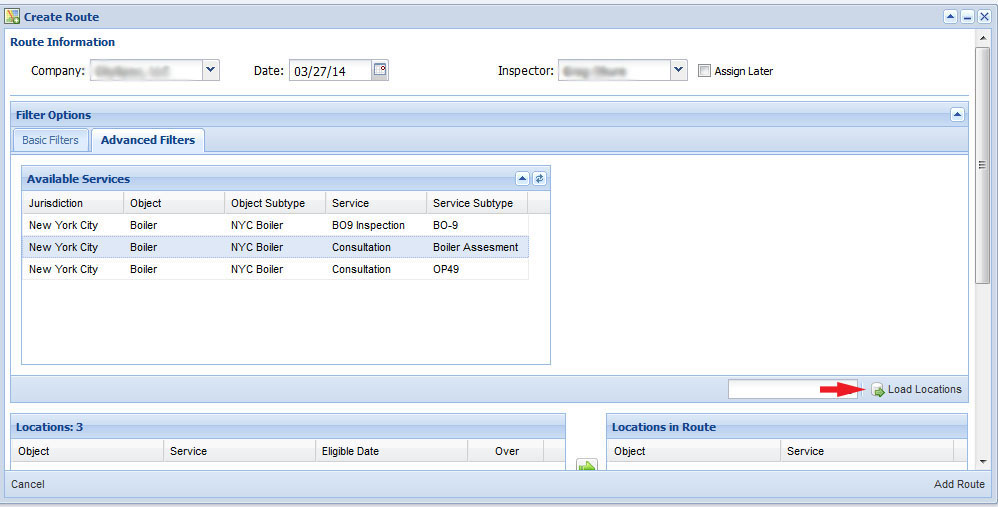
To Create a New Route Using Advanced Filter Options
- Scroll down in the New Route window, you will see tabs with two filter options. In the Advanced Filter tab you can filter by service(s).
- Select or multi-select (using your shift key) service(s).
- Click on Load Locations.
Adding Locations to Create a New Route
Continue to scroll down past the filter options in the New Route window. There are three ways to add location(s) to a new route.
- Select a location to add to the route from the list, click on the
 Add Arrow to add the location to the route.
 - To add all listed locations to the route right click on the locations, then chose Select All. This will highlight all the locations. Add locations to the route by using the Add Arrow.
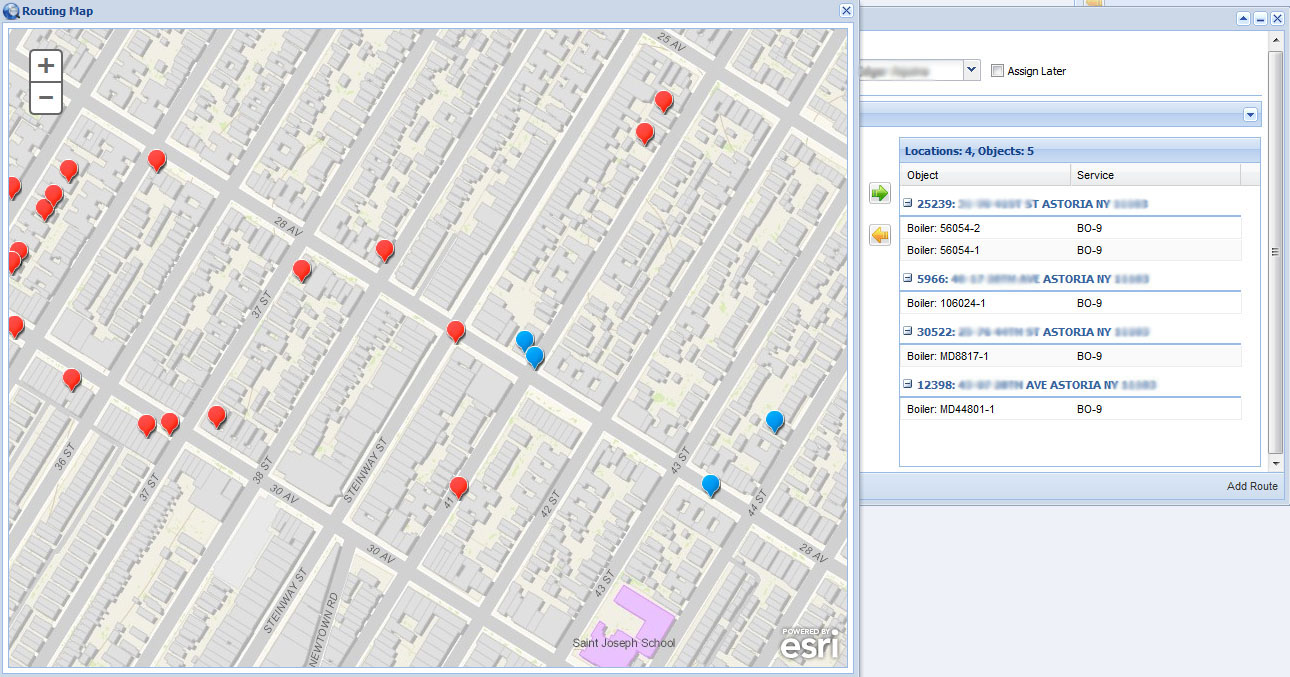
- You can right click, Select All services, then click Large Map, also in the right click menu. To add locations on the map click on the markers and then Add Route.
- To preview the locations before adding them to the route, select the location(s) in the left list and right click, then click on Large Map. You will get a help window of a map with all the marked location(s).
- Remove a location(s) from the route use the
 Remove Arrow, you can Select All by right clicking as well.
 - Click on Add Route in the bottom right corner of the New Route window to complete.
This is the second button in the Routing window. From here you can edit existing routes.
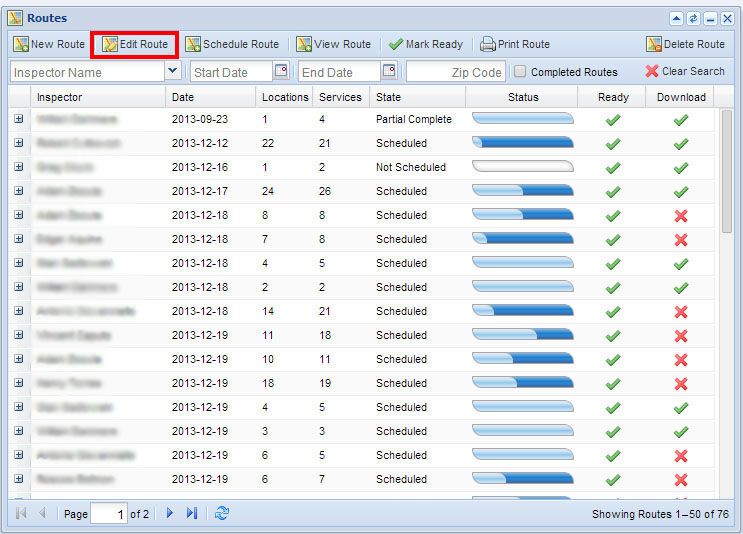
- Select a route to edit.
- Click on the Edit Route button.
- Edit any desired information in the help window.
- Click Update Route in the bottom right corner to save changes.
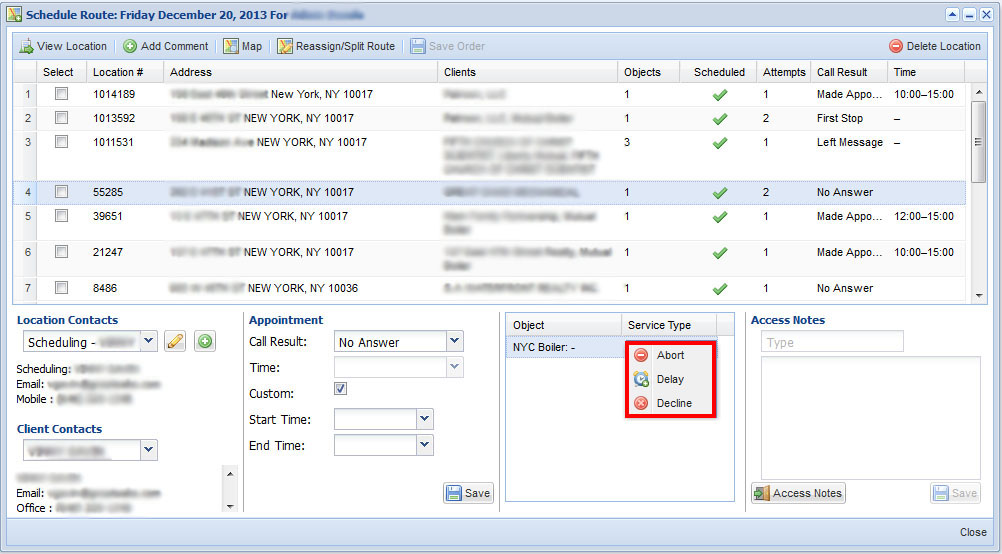
Schedule Route
This is the third button in the Routing window. From here you can schedule appointments to pre-existing routes by date and inspector. You can also view location information and perform service actions for the scheduled locations and services.
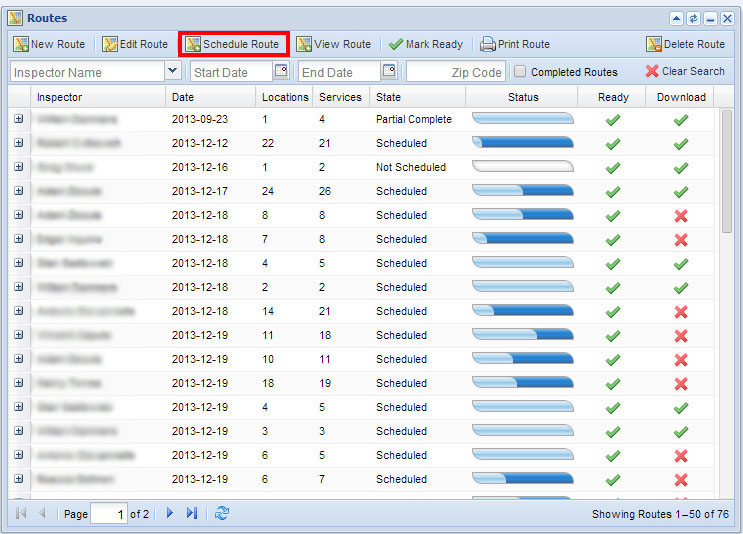
- Select a listed route.
- Click on the Schedule Route button.
- You will get the following help window:
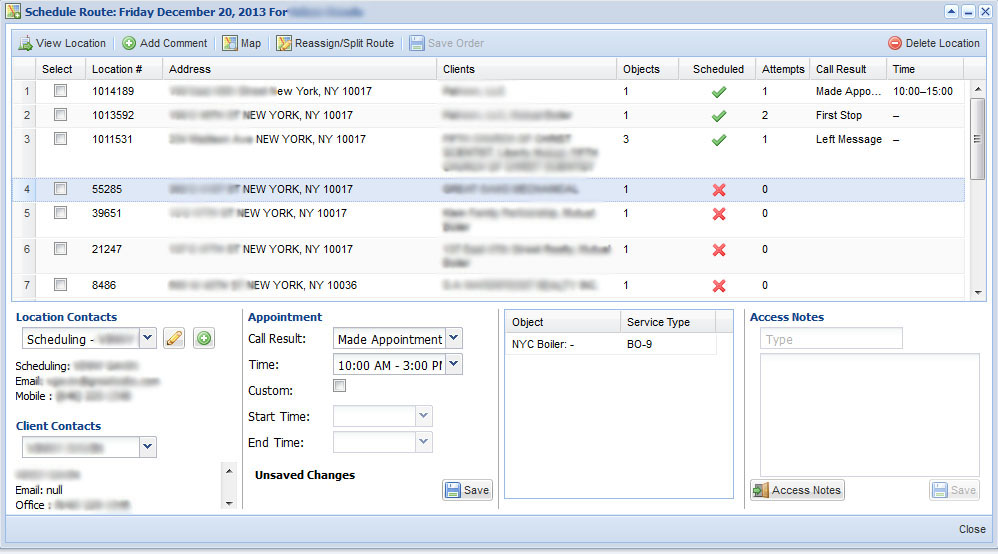
View Location
This is the first button in the Schedule Route help window.
- Select a location from the list in the help window and click the View Location button.
- This will take you to the locations help window discussed on the Locations page.
- From there you can view further information about the selected location.
Add Comment
This is the second button in the Schedule Route help window.
- Select a location from the list in the help window and click the Add Comment button.
- Enter desired comment and click Submit.
- Comment will be added and can be viewed in Location>Event History.
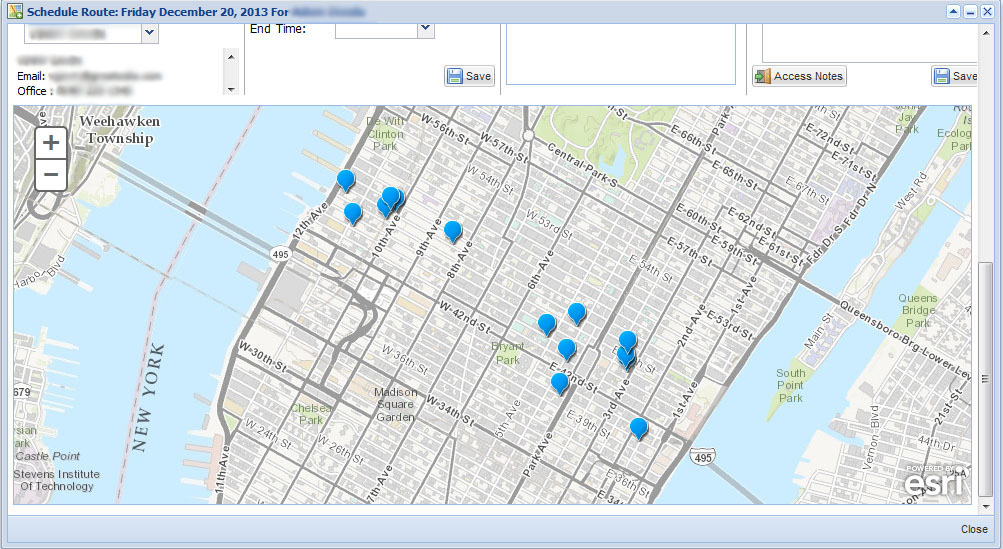
Map
This is the third button in the Schedule Route window. This feature allows you to view all the locations in a route on a map. Click on Map and scroll down to view all the locations/services routed on a map.
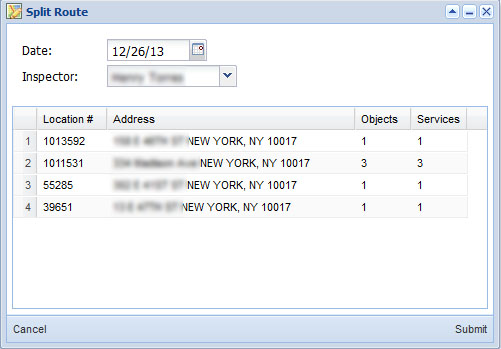
Reassign/Split Route
This is the fourth button in the Schedule Route window.
- Select locations from the existing route you want to reassign or split by checking off the locations.
- Click on the Reassign/Split Route button and you will get a help window.
- Enter a the date you wish the new route to be performed.
- You can also assign the new route to a new inspector or leave the existing inspector in place.
- Click Submit.
Save Order
This is the fifth button located in the Schedule Route window. If you rearrange the order in a selected route this action will become valid.
- Drag locations into your desired order.
- Click Save Order.
Delete Location
This feature is located in the top right corner of the Schedule Route window.
- Select a location from the list.
- Click on the Delete icon, and enter a comment (required).
- Click Submit.
Location Contacts
Location Contacts is located under the list of locations in the Schedule Route window. These are contacts associated with the selected location.
- To edit a location contact select a contact from the drop down list. (locations may have more than one contact assigned)
- Click on the
 Edit icon. Edit any desired information in the help window then click Update Contact.
 - You can add a new contact to the location by using the
 Add icon. Fill out the required information:
 - First Name
- Last Name
- Address (click Use Location Address to use the current address or enter a new one)
- Phone Number
- Click Validate then Add Contact to complete.
Client Contacts
Located directly under Location Contacts in the Schedule Route window. These are contacts who are associated with the location. To view Client Contact Information select them from the drop-down list.
Appointments
Located in the Schedule Route window. This feature allows you to set an appointment for the location selected. To set an appointment:
- Select a listed location.
- Select a Call Result from the drop down list.
- Select Time, if applicable.
- Select Custom by checking off to customize time more accurately.
- Select Start & End times if applicable.
- Click Save.
Object Listed Features
Located in the Schedule Route window to the right of Appointments. Right click on an object and a menu will appear with the following features:
- Abort: location will be removed from route.
- Delay: create a delay to the location so it can be routed at a later time, fill out required information in the help window.
- Decline: decline the location for the current cycle, fill out required information in the help window.
Access Notes
Located in the Schedule Route window to the bottom right. This feature allows you to add and view notes.
- To view an objects access notes click on the object listed and access notes will appear (if applicable).
- To edit and add additional notes click on an object listed and add notes in the comment box. Click Save.
- To open Location Access Notes click on the Access Notes button.
View Route
Located under the main Routing window, View Route is the fourth button. From here you can view route details.
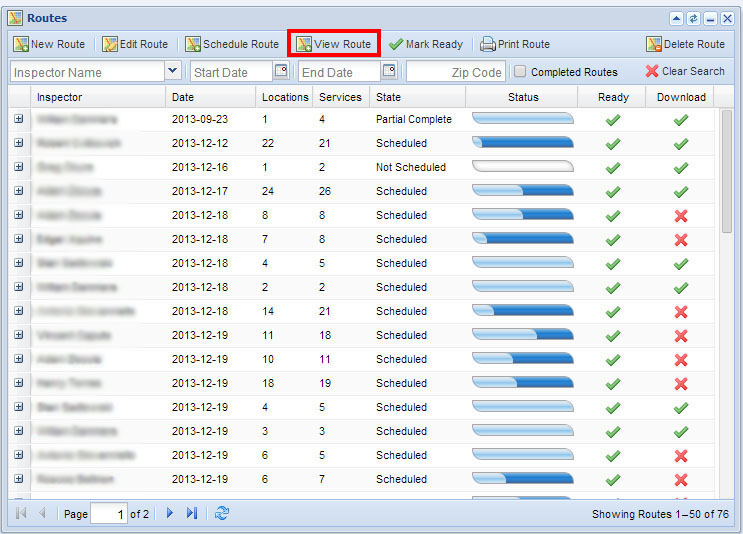
- Select a route and click View Route.
- You will get the following help window:
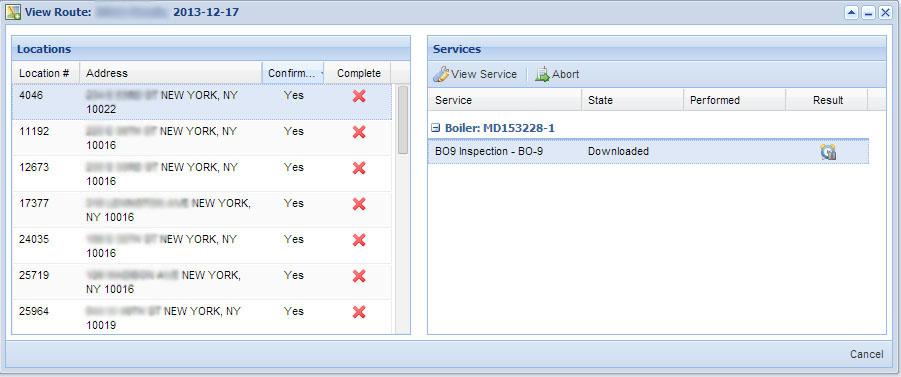
- To view a service at a location, select a location, then a service then click View Service.
- To abort a service at a location, select a location, then a service then click Abort, fill out the required fields and leave a comment. Then click Submit to save.
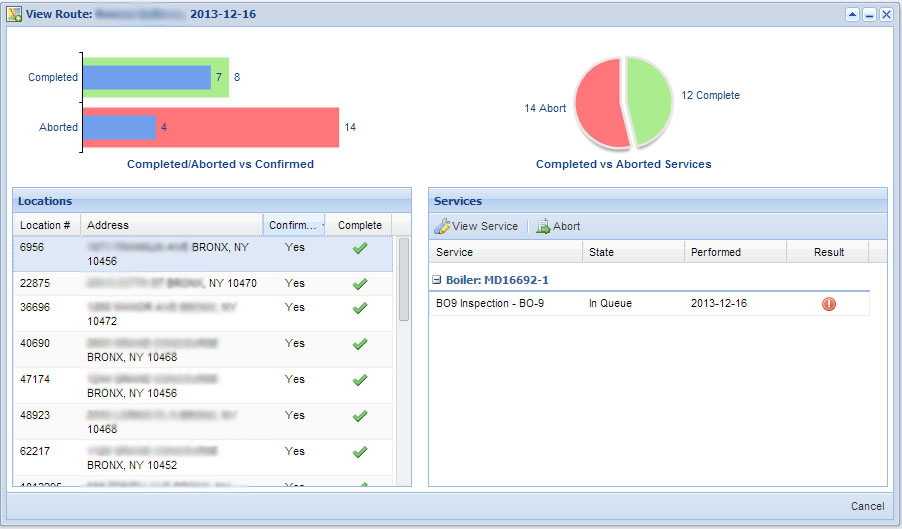
To View a Completed Route
This view will give you statistics and all the outcomes of a completed route.
- Go to the main Routing window.
- Check off the Completed Route box.
- Select a completed route.
- Click View Route or double click on the selected route.
- This will bring up the above help window.
Note: The bar graph on left shows the number of confirmed appointments that have been completed and have been aborted on a route. (Blue color bars are total confirmed appointments) The pie graph on right shows the number of services complete vs the number of services aborted on a route.
Located under the Versentia Home > Logistics > Jobs this window will give you a list of performed jobs.
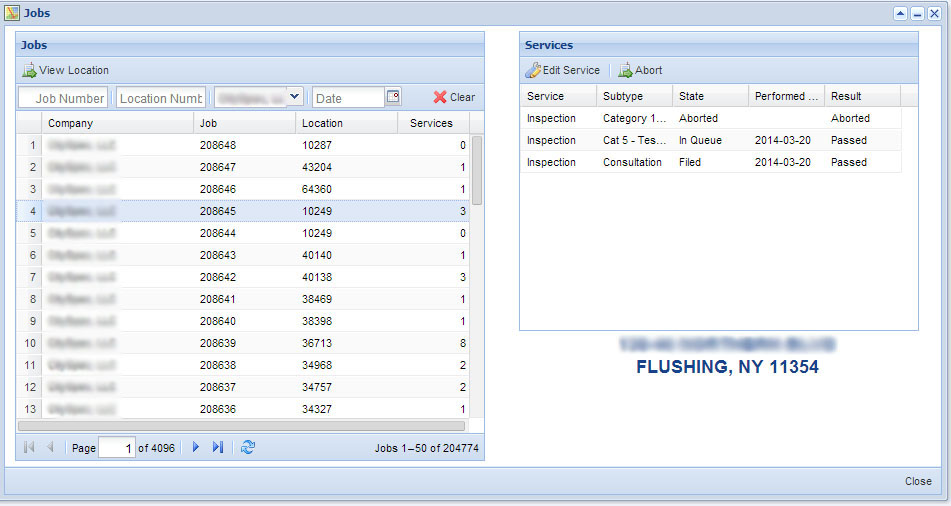
Search Options
You can search the page by:
- Job Number
- Location Number
- Company
- Date
To clear the search field click the ![]() Clear Search icon in the top right corner.
Clear Search icon in the top right corner.
To View a Location
- Select a job and press the View Locations button in the top left corner of the window.
- This will take you to the Locations window.
Edit Services
- Select a job then select a service from the service list.
- Click Edit Services.
- Edit any desired information
- Click Update Service.
Abort Services
- Select a job then select a service from the service list.
- Click Abort.
- Select abort information: category, abort state, comment.
- Click Submit to abort the service.
Located under the Versentia Home > Logistics > Field Location this window will give you a list of field locations.
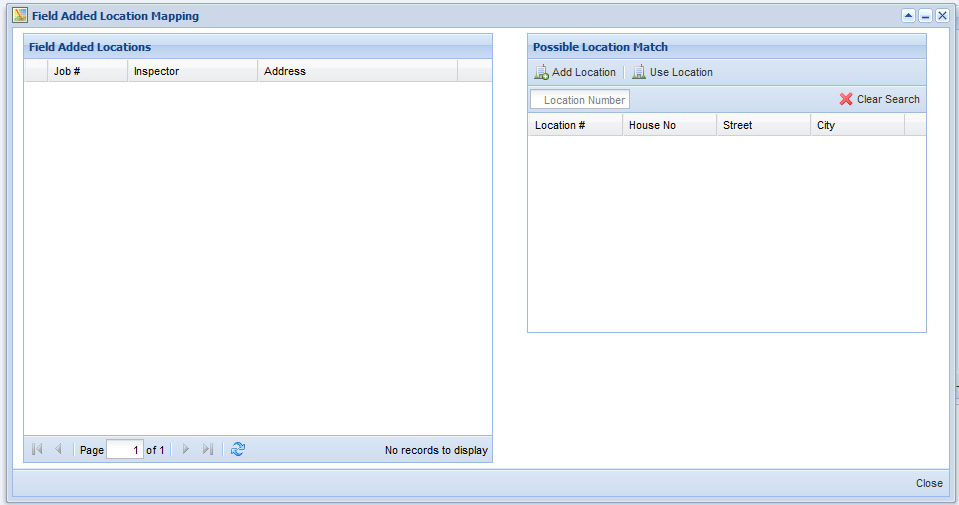
Add Location
- To add a new location click Add Location.
- This will take you to Locations > Add Location page, see the Locations page for instructions.
Use Locations
- To use locations from the Possible Location Match list.
- Select location from Field Added Locations.
- Click Use Location.
- Add field added objects by clicking Add Object or clicking Match Object to match an object.

Search Options
You can search the page by:
- Jurisdiction Code
To clear the search field click the ![]() Clear Search icon in the top right corner.
Clear Search icon in the top right corner.
Add Object
- To add an object to a location select an object listed under field added object.
- Click Add Object.
Match Object
- To match to an object already created select an object listed under Field Added Objects.
- Click Match Object.
- Matches for a Field Added Object will help window.
- Click
 Accept Match to match an object.
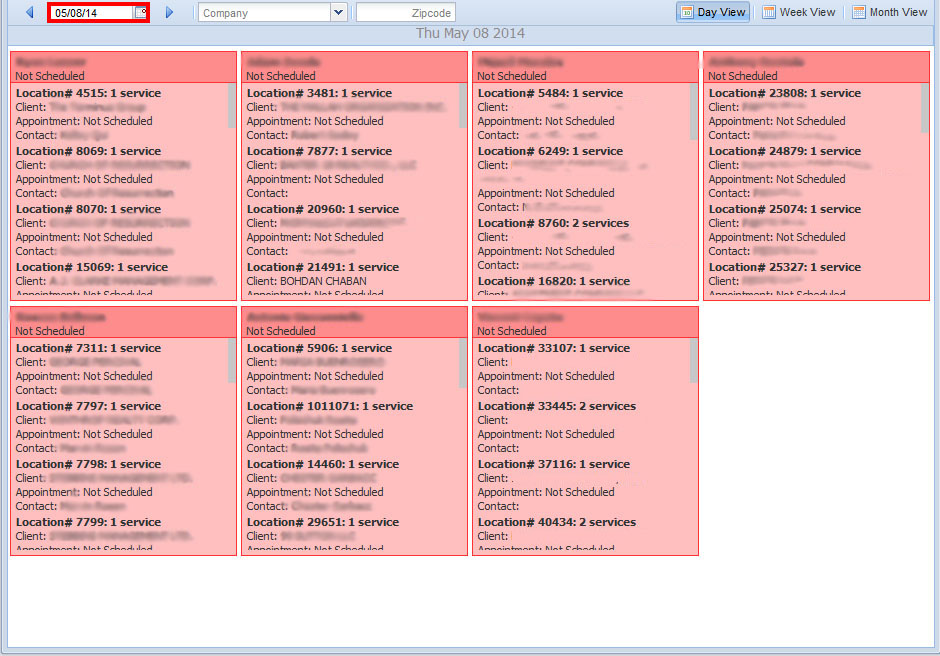
Located under the Logistics drop down menu, the Calendar window will show you the amount of routes, locations and services scheduled per day.

Search Options
You can search the page by:
- Date
- Company: routes for this company will be highlighted in green
- Zip code: routes with the zip-code will be highlighted in green
To clear the search field click the ![]() Clear Search icon in the top right corner.
Clear Search icon in the top right corner.
Calendar Views
You can view the calendar by day, week or month using the button in the top right corner. Below is an image of a daily view, with more detailed information on routes and locations:
Located under the main Logistics drop down menu the Pending Locations window shows you any areas that need to be completed.
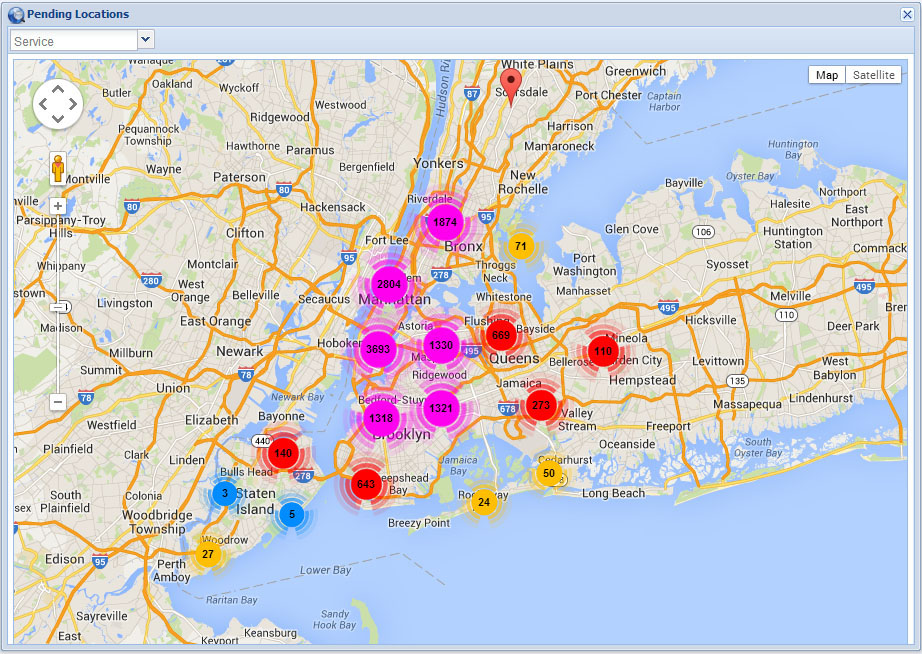
General Features:
- Different colors are used to represent the amount of locations in need of service in a specific area. Color ranges from pink that have the most services available to blue with the least services available in the area. Click on the color to narrow down the search.
- You can zoom in by either clicking on a group of services or by using the Zoom In icon to the left.
- You can zoom out by clicking on the Zoom Out icon to the left.
- You can switch to Satellite view or Map view by selecting one or the other in the top right corner.